
It's been a busy weekend for A Song of Ice and Fire in the UK, with multiple events including Boards and Swords at Derby's 12 player event on Saturday 24th https://www.facebook.com/events/2302307140080120/ , Dukes Gaming event at Pontypool same day https://www.facebook.com/events/893816710981306/ and Entoyment Wargaming and Hobby Centre holding a Charity event on Sunday 25th https://www.facebook.com/events/2012428275550069/
Sadly, Saturdays don't generally work for me and the South Coast is a good 5 hour drive for me. Fortunately, Imps Gaming over in Lincoln were holding their second ASOIF event on Sunday 25th https://www.facebook.com/events/624680648030559/ The 2.5 hour drive from Liverpool is worth the effort as the lads over Lincoln aren't overly competitive, play in a fine spirit and the games first time round were chilled and very informative.
This time out was same as last time with 40pts and two lists, but I decided to just play The One True King, Joffrey Baratheon with his Kingsguard and a strong infantry force.
Joffrey Baratheon (C) with KingsGuard
3 x Lannister Halberdiers
2 x Clegane Mountains Men
NCU: Tyrion Lannister
I wasn't too thrilled at having one NCU but I wanted to make sure I had plenty of combat units, so its always give and take...

GAME 1: Neil Jefferson and Free Folk
Scenario: Feast of Crows
Tormund Giantsbane (C) in Cave Dweller Savages
Free Folk Raiders with The Weeper attached
Free Folk Raiders
Free Folk Trappers with Ygritte
Savage Giant
Savage Giant
NCU's
Styr
Mance Rayder
Not having really played against Free Folk too much, especially the new attachments and NCU's, I was concerned about a lot of auto-wounding on the Kingsguard, especially as it was agreed that Joffrey would count as an attachment and was therefore susceptible to Ygritte's assassination one-shot. Not sure if this is correct, but agreed upfront so no issues and it didn't factor in the game...
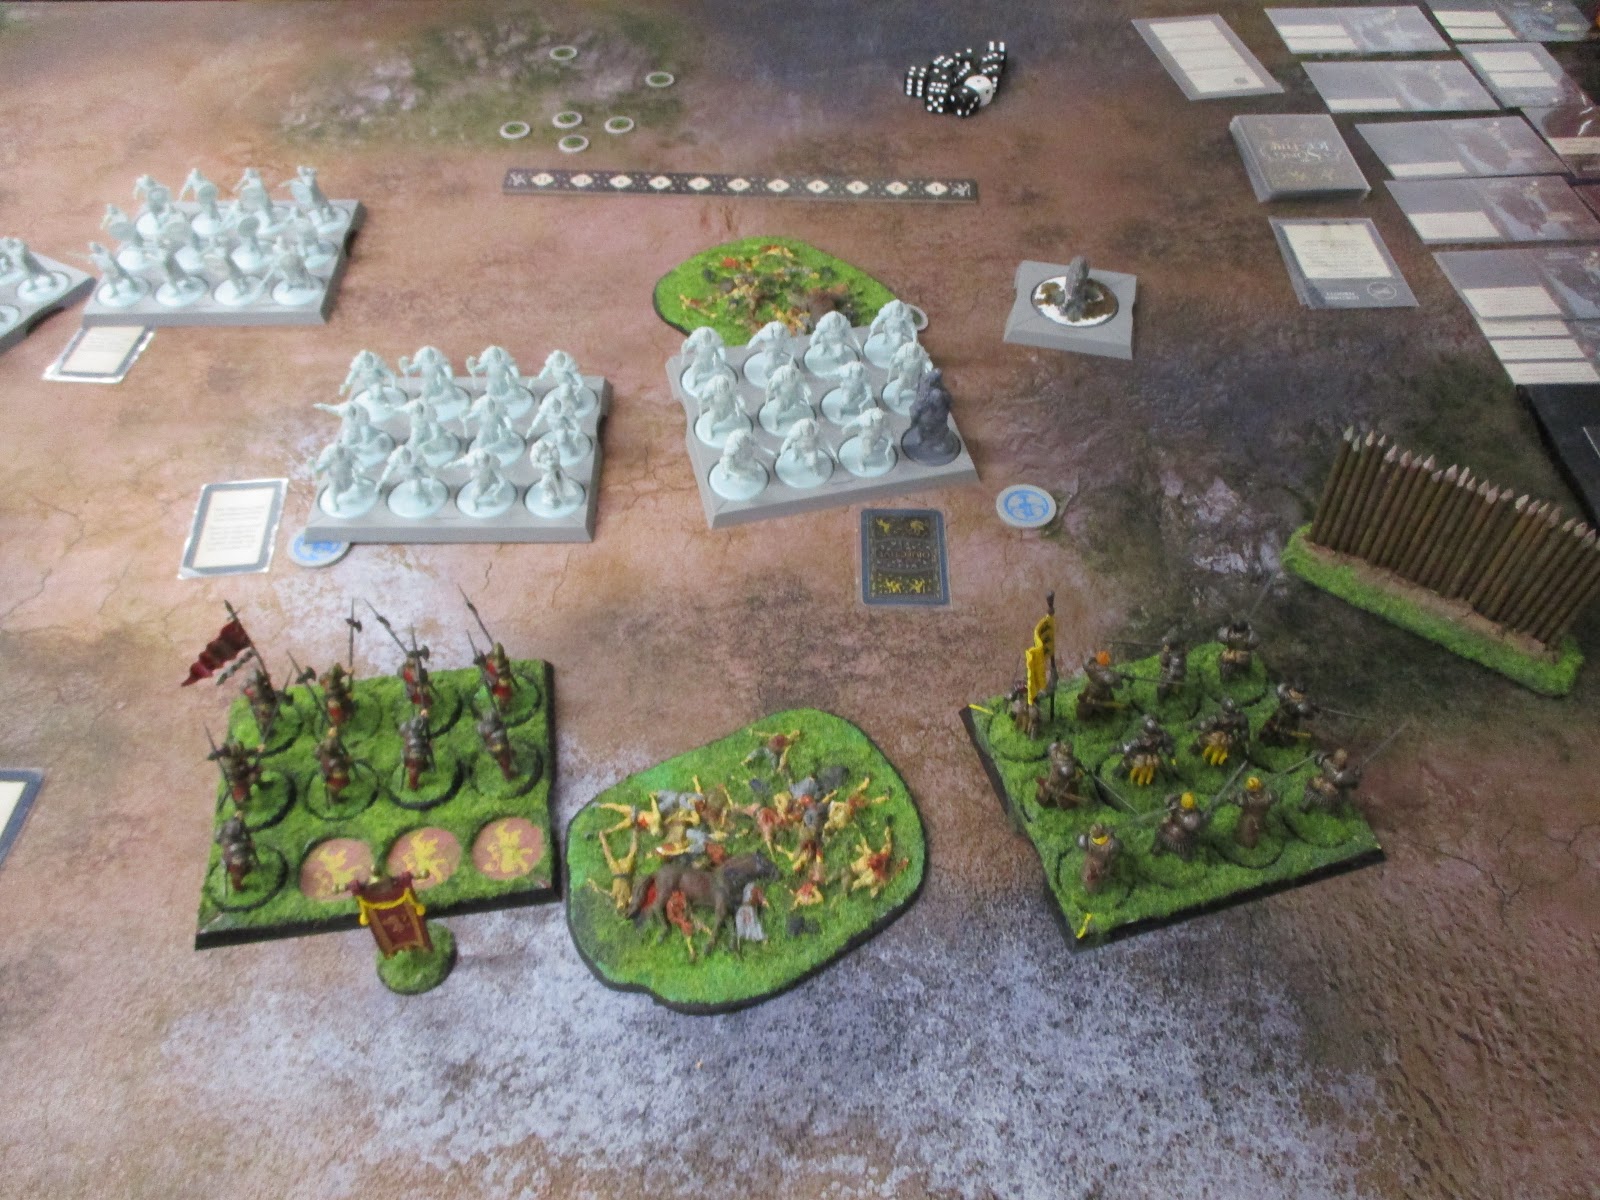
Set up
I won the roll off, and decided to choose board edge and go first in turn 2...
Terrain wise, we had 3 corpse piles to start, a row of stakes and two Weirwood trees.
I deployed left to right, Mountains Men, 3 Halberdiers with Kingsguard behind and far right, Mountains Men

Neil set up Ygritte and Trappers on my left with Tormund and the Cave Dwellers next to her, then the bare Raiders, with Giant

Weepers Raiders and the second Giant...

Turn 1 saw my Halberdiers advance steadily up the centre, and the FF countering. Mance NCU stymied my movement and loaded conditions on my left Mountains Men, while Joffrey lingered in the rear

Tactics wise, I found Mance to be pretty nasty...


Sadly what transpired, was pretty horrific. I tried to bait with my left Halberdiers, who failed a charge against the FF raiders but di lure the Giant into their flank. That was fine, and the unit was still ok, allowing Joffrey and the Kingsguard to flank the giant in turn. However, nifty card and attachment combos followed, allowing Ygritte and her trappers to hurt the Mountains Men, who tried to get into the Savages, but fluffed due to Mance's conditions and their reduced ranks and were promptly eaten by Tormund and his Savages who over ran with a card to charge into the Halberdiers and finish them off. My left flank in the aftermath wasn't good, as it wasn't there...

The Kingsguard had 4 units against them now...

I did manage to get one unit of Halberdiers into the giant, but failed to hit the Weepers Raiders while the Mountains Men on my right were looking good to hit the Giants flank

Tyrion on his own, was outmatched off board by Mance and Styr...

End of turn 2. Worth mentioning that I was adding VP's to my forces by failing quite a few morale checks near corpse piles, and the FF were not...

TURN 3: The Savage Giant with two wounds taken swung at Joffrey via the tactics board and missed... I swung back and got the beast down to one wound, so it swung back, hitting and Joffrey had to scream "I am the King" to avoid losing his, err Uncle Jamie and the Lord Commander. Tyrion then intervened, allowing the remnants to retreat, but some card shenanigans allowed the Cave Dwellers to close and charge in...
 |
| However, Jamie and Ser Barristan Selmy defended the King valiantly, and Joffrey survived!!! |

The Mountain's Men avenged their House Brothers by killing the giant on my right, freeing up a Halberdier unit, while the other Halberdiers didn't make an impression on the Weepers unit, but survived as the other Raiders failed a charge. And I was first next turn, so perhaps the King could be saved!!!

TURN 4 My Halberdiers managed to charge over the corpse pile and crashed into Tormunds flank (Needed 4+ on both dice) and wiped out all the Cave Dwellers Savages with the attacks and panic...

Sadly, Tormund survived but knew he was doomed, so hacked away with 4 dice...

Ending Joffreys rule...

Tyrion took the swords, avenging his nephew as the Halberdiers finished off Tormund...

However, the Weeper and the other Raiders finished off my Halberdiers and turned to face the Mountains Men, who suddenly found out why the Wildlings are called the Endless Horde, as the Cave Dwellers arrived, unactivated as Sty held the horses tactic board space, and they promptly charged in and took 4 victory points, tallying up 7 for the round with Joffreys demise and giving Neil a large and thoroughly deserved 13-3 win...
The flurry of cards and combos in turn 2 put me firmly on the back foot, and only the Cave Dwellers yielded an extra VP to me, whereas I failed countless morale check to pile on extra VPs (The Mountains Men below had 3 failures despite the Weirwood they're sat on). Neil was very apologetic about some good dice rolls (his FF raiders hit on all attacks more than once) but I know about luck, so didn't begrudge it. Simply put, Neil played exceptionally well and I simply wasn't aware of how the savage the, err, savages from beyond the Wall could be... Always a good way to learn, and I did enjoy Joffreys valiant efforts.

GAME 2: Harry West and House Stark of Winterfell
Scenario: A Game of Thrones (My favourite and most played one)
Harry agreed it would be more fun to play the objective cards "blind", TO was happy with that. (Like I said, nice and chilled way to play over in sunny Lincoln)
Umber Berserkers with Robb Stark (C)
Umber Berserkers with Bran and Hodor
Sworn Swords with Captain
Sworn Swords with Captain
Stark Outriders
Greywind
Summer
NCU: Caitlyn Stark
Board Set up and deployment
I took a palisade to narrow the board, placing it extreme right, with a pair of corpse piles centre right in both halves and a Weirwood far left placed by Harry.
I set up similar to last time round with a core of 2 halberdiers central, with Mountains Men on the wings and Halberdiers extreme left to keep the Outriders at bay, and Joffrey bringing up the rear. Harry set up with Outriders on my left, with Summer, then both Sworn Swords, Robb's Berserkers, Brans Berserkers and Greywind. (Midway through turn 1, we realised Greywind and Summer were set up wrong, but being in such a nice and chilled environment, wasn't an issue to swap them over)
Turn 1 Tyrion took the horse space, to ensure my Halberdiers got to an early objective and I raced up. Harry held back a nit, which is unusual for Starks but he'd only had (one game?) before the event.

The objective my side of the Weirwood allowed me to heal D3 wounds on a unit when scoring...

The Sworn Swords uncovered the objective on their side of the Weirwood, allowing a free manoeuvre/retreat when scoring.

End of turn 1.

Robb's Berserkers advanced up and took the central objective, revealing it to score 2 VPs instead of 1. So I figured it would be good to try and shift him off it!!!

As above...

I advanced up Haberdiers into Robbs face, ready for next turn...

I wasn't sure about getting into Hodor's Berserkers who had advanced to support Robb, as he could do some nasty things with Summer and Bran, but couldn't remember what. Also, the sword zone wasn't taken and I'd already activated tyrion
But on the far left, I took advantage and marched up onto the extreme left objective which forced a panic check on an enemy when scoring, confident my Halberdier "Set for charge" would fend off the light horses of the Starks...

Oh well, I wouldn't win by sitting back and in charging Hodor's lot I would take the right objective, which allowed an enemy to be weakened and vulnerable when scoring.

It was a slaughter of maniacs, as the Berserkers lost a lot of men (including a few to a low panic roll ) but infuriated, they slapped the Cleganes who also lost men in the panic... But as you can see, Summer wasn't used (as Harry was reading of off Bran/Hodor, and not Summer's card) This would have turned out so different if Harry had did Summer/Bran/Hodor combo right but we didn't realise that til later...

And it didn't get any better, as having seen Harry roll low on one panic, I figured he could try again at the end of the turn...

And he did, double ones with a corpse pile nearby leaving Bran and Hodor alone and me up first next turn...

TURN 3
My Mountains Men would activate first and finish off Bran and Hodor...

This incensed Robb, whose Berserkers charged the Halberdiers, losing five or six to Set for Charge, Harry then rolled another panic failure, bringing them down to 4 men. I managed to save a few, and activated, finishing Robb and his unit off and taking the 2pt objective. Never seen Umber lose so many men to panic, Harry was really unlucky...

With the right flank fairly secure, I was happy with the set up on my left too. I felt pretty confident. I went in with Halberdiers to Sworn Swords and shifter 50% right, while other Sworn Swords would take flank instead charging Mountains Men. This allowed Joffrey to use free manoeuvre Banner to join Mountains Men in engaging Sworn Swords. All going to plan...

So Harry slapped that confidence away with another frontal charge on my Halberdiers on the objective, which managed to reduce his ranks, limiting his attacks. But the all hit, and despite the weirwood I couldn't help roll a double one on my morale, the unit went and suddenly my flank was in jeopardy...

End of Turn 3
Lannisters had 9 Victory points, Starks had 7. Though I held the upper hand in men and units, but I was worried...

Summer had charged Mountains Men last thing in turn 3 (Not shown above) and so Catelyn took swrods and reduced my MM to 2)

I was determined to hold the 2 point objective, so played hummed and haa'd whether to play defensively...

But in the end, decided to attack with Mountains Men who finished off the Stark Sworn Swords and turned to face the Outriders

They did their duty, but their momentum was gone and they only inflicted a few casualties and my resolve held...

The Halberdiers on centre objective were boosted by Tyrion, and Summer finished of the remaining two Mountains Men on my right but the Starks could not overhaul the Lannisters...

House Stark of Winterfell 11 Victory Points
House Lannister of Casterley Rock 13 Victory Points
Well, what can I say. That was an awesome game, and it was far closer than it should have been from my point of view. Robb's Berserkers crumbled so easily due to some horrific dice rolls, as did Brans unit ( and the Summer card error) but Harry didn't let it faze him and the Outriders, despite being driven off earlier, came back with a vengeance, as did Summer. However, I had edged ahead and kept the gap in Victory points to get the win...


GAME 3 Jason Riley and Howland Reed Starks
Scenario: Fire & Blood
I'd faced Jason at Lincoln at the end of June, when his vanilla Stark army under Robb Stark had absolutely ran rings around the Mountain...
This time, Jason would face Joffrey with Howland Reed and his kids.
Howland Reed (NCU Commander)
Arya Stark NCU
Sansa Stark NCU
Sworn Swords with Captain
Sworn Swords with Captain
Sworn Swords with Meera
Sworn Swords with Rickon Stark and Orsha
Shaggydog
Umber Berserkers with Jojon Reed
Hadnt faced Howland before, nor his kids but this game mode doesn't call for subtlety, so I deployed two lots of palisades to close down the board, while Jason put some corpse piles about.
I opted to deploy (left to right) Halberdiers, Mountains Men (given token by Jason), Kingsguard, Halberdiers, Mountains Men (given token by Jason), Halberdiers.
Facing me, Jason deployed (my left to right) Berserkers with Jojon, Sworn Swords with captain, Sworn Swords with Rickon and Orsha (given token), Sworn swords with Meera (given token), and Shaggydog and Sworn Swords with captain

TURN 1.
I had elected to go first, with Tyrion getting the free move spot and moving my Halberdiers up to threaten Meera's unit. Jason countered, panicking my advancing Halberdiers losing a few on the way in with Meera's traps wounds and ensuing panic. As I said, I wasn't being subtle and charged in with my halberdiers, with Joffrey using "You will obey ME!!!" to get 9 attacks, hitting on 3's with rerolls, which cut through the Starks, with the panic dropping the unit to 3.

Jason decided to respond decisively on my left (which has proven to be my weakpoint so far). However, the Starks run of dice seems to have carried over from the previous game, as my Halberdiers set for charge hit 7 times, 7 Sworn Swords fell, and the resulting panic test was a double one. The attack was wiped out with not a single Lannister falling!!!

Turn 1 had already proven brutal, and so it continued as I advanced up my right halberdiers, who were charged by the other Sworn Swords with captain, who lost 5 to set for charge but were resolute and cut down 8 Halberdiers with help of panic. On the left, having already used my order, Jojon Berserkers hit hard but only killed 5 Halberdiers there...

I advanced up my Mountains Men ready for next turn on the right

Having already done the same on my left...

Shaggydog activated and moved to flank my Halberdiers in the centre, killing two and then I fluffed my morale, wiping out the unit...

My last activation was Joffreys Kingsguard,and I used the Traitors card to panic Meera and force a check, which they passed before using the free manoeuvre to advance up and try and charge Meera. Howland used his Bog Devil Ambush, in long range of Jojon when they activated, to kill 3 Kingsguard with bad saves from me.

And I failed my charge!!!

Turn one had ebbed and flowed, and it still looked tight on the left...

And same on the right....

Rickons Sworn Swords used a card to advance up, then flank the Kingsguard, again dropping the unit to Joffrey, who did not waiver...

I used my second "Traitors card", forcing Meera and her remaining Sworn Sword to take a panic test, which they failed and also putting panicked on Rickons unit.

My left Mountains unit crashed into the flank of Rickons unit, with Joffrey screaming "YOU WILL OBEY ME!!!" to give them a whopping 10 attacks on 2+ with rerolls, and a resulting -4 panic check with corpse pile, vicious and flank... With both marked unit going, one at the hands of one of my marked units and a bonus for Rickon, the tide turned decisively for the Lannisters...

I lost both Halbderier units on my flanks, but Joffrey on his own charged into shaggydog after marking him for a point, taking critical blow and sundering for 8 re-rollable 2 plus attacks and making himself a nice new wolfcloak.

Alone and at the rear of the Stark side, King Joffrey surveys the field... A solid victory of 13 to 4 for the King!!!

That went well. Jason wasn't fully aware of Joffrey and the Kingsuards prowess, or Joffreys cards which were perfect for this match up but like Harry, it was the dice that let him down. I simply used my larger units to quickly close and negate his NCU superiority. It was a good match up, and a real slaughter, with my marked units scoring and not dying, while I concentrated on targeting the units I'd marked and ganging up on them...
So over all, three great games, with a resounding defeat to start followed by a narrow win and a resounding victory.
It was another great event, very friendly and relaxed, with opponents who helped each other rather than take advantage, so a big thanks to everyone at Imps for organising it and the players themselves who finished as below I think
Overall winner with 3 victories: Ben Barczak. (Lannisters, with Tyrion Commanding, NCU Pycelle and Cersei?Crossbows, Bastard Girls, Flayed Men and Knights of Rock)
Jordan Dannatt
Me with 2 wins for House Lannister (outlined above) and Best Painted prize (Think Ben deserved it, but as overall winner they must have been feeling charitable to me)
Neil Jefferson with 2 wins for the FreeFolk with list as above
Harry West with 3 defeats for House Stark with list as above
Jason Riley with 3 defeats for Howland Reeds Starks as aboveEveryone got prizes from the Starter Kits, Free Folk or Nights Watch bag, ruler or figures, so that was great too. Hope to get back over for the next one, looking to be end of October I believe and possibly 3 x 50pt battles...
Once again, thanks Imps Gaming
https://www.facebook.com/ImpsGaming/?epa=SEARCH_BOX