Tuesday 26 February 2019

Blood and Plunder Campaign, Conception Island, Chapter 3: Rescue the Captain


Captain Ormerod has marshalled his crew from "Lion's Whelp", sending some to get assistance from the far side of the isle but he felt his duty was also to try and gauge the Spanish intentions. As his local guides reported the Spanish had split their forces, (unbeknown to Ormerod they had to raid for boats given their own shortages) there only seemed to be a number of limited  Spaniards on the bays edge, where a makeshift lodge housed their men and doubtless where Captain Smythe was being held. Ormerod smiled, as if the Spaniards were feeling secure believing the English dispersed, he would have to give them pause for thought...

Chapter 3 would see the English given a chance to rescue their captured Captain. Additionally, Chris got to take the pictures and I would try and  do the write up with a Pro-English slant (as opposed to my allegedly anti-English bias)

We would play the "Rescue" scenario, and use the Night attack and sentry rules. Additionally, we figured the Spaniards would be tired given they would be roused from sleep, should start with a fatigue point on each unit. Captain Smythe would stay comfortable in the pig pen, as we hadn't any pigs yet. Also, given his wounds, he couldn't move more than 2"...

All 4 Spanish units would "deploy" from the central hut, while the English and their local native Carib allies would set up on one side and flanks.

Chris's forces:

English Buccaneers and Native Caribs:

Captain Ormerod, Inexperienced English Buccaneer Captain
8 Freebooters
8 Filibustiers
6 Sea Dogs
Seasoned Carib Chief
8 Warrior Archers
8 Young Warriors

40 men, Strike points 10/20/30

My Spanish forces:

Ensign Sarento, Inexperienced Spanish Officer
2 x 10 Milicianos
1 x 8 Lanceros
1 x 6 Miliciano Indios

35 men, Strike points 8/16/24


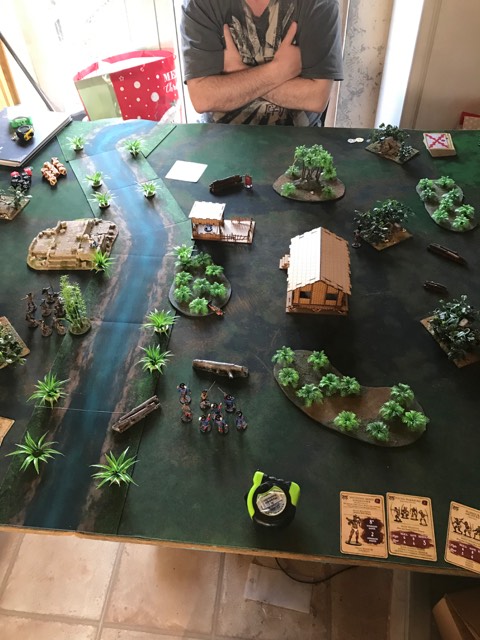
The Board set up


The evil Spanish commander...


The Spanish forces, with their new "lucky" dice


The English and Native Caribs


At just under 150pts, I was allowed three sentries


The English forces set up with Filibustiers left of centre with good field of fire, Captain Ormerod in with the Freebooters central right and Sea dogs ready to storm the cabin and rescue the Captain. The Carib Chief and his Warrior Archers on the left were guided to where the Captain was lying, while the Young warriors took the other right flank


Ready to go...


The sentry isn't being very attentive...


Pei-Pei, my sentry, doesn't eat enough carrots, as he cannot sea the English in the dark...


The Carib Archer Warriors natives are guided to the wounded English captain...


TURN 1

Pei-Pei takes a leak...


As the main Spanish units sleep, the Archer Warriors advance and take out the sentry in the bushes...

the rest of the turn involved the English and allies creeping forward in cover of the dark...


TURN 2

The night masks the encroaching Anglo-Carib forces...


Young Warriors top, Sea Dogs in scrub and Captain Ormerod and his Freebooters hid behind the denser parts of the jungle


The young warriors open up on a sentry with their bows...


But none proved fatal, and the Spanish sentry yelled for assistance...


And so battle was joined. The Spanish Ensign roused his Milicianos, running out into the dark and rushing a volley into the bushes where the Caribs were believed to be, with a scream suggesting there was at least one casualty...


He also commanded the remaining Milicianos in the hut to open up on the Sea Dogs, dropping one. However, this gave Ormerod's Freebooters a target, but the hut proved too small a target....


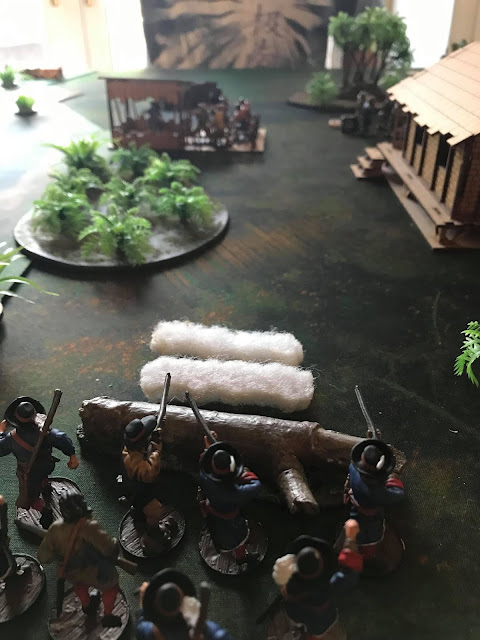
The Filibustiers, even at long range, prove nasty as ever but the cover of the pig sty saves the Miliciano Indios from too much lead...


End of turn 2

The Spanish were roused, with half of their forces rushing out into the darkness as the English closed in...


Turn 3

Chris pulled an event card, which oddly enough proved to be good as he rolled "Lucky" on the table and his Warrior Archers got a free round of fire against my Indios, claiming another victim. On the first activation, the Young Warriors forced the Spanish back under a flurry of arrows, killing three and shaking the young Ensign and his men. As the arrows rained down, the Spanish troops outside looked to rally, while the Indios advanced in to the pigsty to secure their captive. The Archer Warriors led by their chief, seized the initiative, charging across the stream and wiping out the Milicianos, and grinning at the bemused Captain Smythe…


As the Lanceros charged out to avenge the dead Milicianos Indios and retake the prisoner, the Warrior Archers evaded into the water and out of the reach of the deadly spears, frustrating the enraged Spanish. And to cover the Sea Dogs advance on the hut, Ormerod's Freebooters unleased a blistering volley at the remaining Spaniards in the cabin...


It was proving a lucky turn alright, as the Spaniards were cut in half...


Literally, losing 50% of the unit in one devastating volley and being forced down...


As the English closed in, Ensign Sarento could barely get his dozy Milicianos in order, having to fall back behind cover leaving only the Lanceros as a viable force to retrieve Smythe…


As the Filibustiers, Freebooters and Young Warriors engage the Spanish at range, the Sea Dogs close up for assault.

TURN 4

As the fight at the stream could prove decisive, I manage da quick 11 spades, only to see that Chris's luck hadn't run out as he trumped me with a 12...


Until the Chief used a command point for a second attack, which although not bad in terms of Lancero casualties, was enough to drive them off...


And without an "Inspiring" leader close by, the Spaniards were not keen on rallying...


With the young Ensign and his men still unloaded, fatigued and driven back, the Spanish were in severe disarray...


The Sea Dogs charged the cabin, the Spaniards inside tried to surrender...


but English butchered the Spaniards to a man...


A final volley from the Filibustiers was enough to drive off the Spanish forces, who had no colours to strike and sullenly retreated back to the relative safety of the beaches...


With 2 strike points to nil and no hope of recapturing the English Captain, retreating and saving some semblance of forces was the only course open to me. I'd lost 21 men with some atrocious luck...


Embarrassingly, Chris had some poor dice too, but not in turn 3. The English only lost 1 man, the Caribs 2...


So all in all, a highly successful English night raid...


And Captain Smythe will doubtless recover quicker following his rescue, than languishing in a pigsty...


After several days in pain from a half dozen cuts and twice as many bruises, and far more hurt at the loss of his men and his beloved "Makeshift", Captain Smythe smiled weakly at young his subordinate, as the large natives supporting him lowered him onto a large tree stump. "Glad to see you, Ormerod. What's our strength and overall situation?" As the young Captain reported that the Spanish were still in strength at the Bay, but seemed reluctant to land in any force nor head inland as yet, Smythe felt his spirits lift. It seemed the Bulldog spirit was still strong in his his men, and the defeat in the Bay had not been as decisive as he had assumed...

That was bad day for my Spanish plans for dominion of Conception Island. Nothing went right for me, and those new Carib forces the English have are damned tricky to counter. With their new rules, such as poisoned arrows, evade and err, ruthless to name but a few, they proved difficult to deal with (even f their primitive bows aren't that scary). However, backed up by the ever deadly Filibustiers and the newly seasoned Captain Ormerod and his Freebooters, the Spaniards are going to have to regroup and reinforce their advance forces...

A Song of Ice and Fire tournament at Board in Brum

Saturday 16th February, Board in Brum put on their inaugural A Song of Ice and Fire: The Miniatures Game tournament. Hadn't been to Board in Brum before, but its a great venue with ample parking and plenty of game systems of sale, including ASOIF, Bolt Action, Gangs of Rome, Star Wars Legion and all Warhammer gear, as well as plenty of board games, unsurprisingly. And being just of the M6 at Jct 10, it's readily accessible from most of England, which is great.


www.boardinbrum.co.uk

Facebook https://www.facebook.com/boardinbrum/

The format was based on CMON's tournament pack in the documents sections https://asoiaf.cmon.com/ To summarise, two lists at 40pts, played on a 4ft x 4ft board. Having only played half a dozen games or so, mostly 50pt on 6ft x 4ft boards and generally the same scenario, I was expecting this more to be a  learning experience. How right I was...

There were 18 players, a pretty good turn out as the game was not long out.  I had one of only 4 fully painted armies along with one Stark and two Nights Watch, and was paired up with Simon Millership's painted Stark army to do a video recording of the first game (hope to add the link soon)

The scenarios were as follows: A Clash of Kings, A Dance of Dragons and the Winds of Winter. The only one I had played was Winds of Winter, as I normally play the Game of Thrones.

Although my second list was more aggressive, I never used it, deciding to stick back with the same force for all 3 games, as below:

Jaime Lannister, The Kingslayer (Commander)
NCU: Tyrion Lannister (The Imp), Cersei Lannister (Queen Regent)

Lannister Halberdiers (with Jaime attached)
Lannister Guardsmen with Guard Captain
Lannister Crossbowmen
Knights of Casterley Rock


My lovely Lannisters

Lannister Crossbowmen

Lannister Guardsmen

Lannister Halberdiers with the Kingslayer

Second unit of Lannister Guardsmen

Knights of Casterly Rock

Cersei and Tyrion in the Throne room. High Seneschal keeps track of the turns...

My reserves for list 2, never used

Nor was The High Sparrow, my second list Commander. Love how much he looks like Jeremy Corbyn...

The army of my opponent in the first game. 2 x Umber Berzerkers with Champions, Umber Great Axes and Lord Eddard Stark commanding his House Guard. Fast and hard hitting

The NCU's were Varys and Baelish

I didn't face it, but the second lsit was polar opposite, with two units of  Tully Sworn shields and two of Stark Sworn swords, with Hodor/Bran and Robb attachments and Brynden Tully NCU. Both armies were exquisite, and I regret not getting some close ups particularly of the Tully Sworn Shields. Simon Won the Best Painted Army Award and it would have been a close run thing between this and the one below...

Tony Moore's Night Watch were really excellent, and must have been 2nd Best Painted army. 


Varys got about a bit...

Nasty Brothers of the Watch, the Watchers on the Wall
GAME 1 v Simon Millership (AKA BERT?)

Hope to get a video link soon


GAME 2: A Dance with Dragons v Roland Hynd's Lannisters

After Game 1's result, I was facing  another aggressive force with 2 units of Guardsmen with Guard Captains (deployed top left below), Clegane Mountains Men (top middle), Knights of Casterly Rock and Lannister Halberdiers led by the Mountain himself as Commander. He had Cersei and Pycelle as NCU;s

The mission was to hold objectives, scoring 1 VP each as of end of Turn 2 (But if your commander is on one, scores and extra point). And an extra point for each unit destroyed. On the left, the objective removed an NCU abilities, centre took D3 wounds of unit per melee but gave vicious and sundering, and right gave out weakened and panicked conditions.

Terrain wise, 2 corpse piles centre and left, right was two palisades bottle necking the area. I deployed heavily on my left, (respectively, cavalry, crossbowmen, halberdiers and both guardsmen)while Roland acknowledged he made errors in deployment by not leaving enough room for his troops space wise after deploying centrally, forcing his cavalry and halberdiers into the bottleneck.

DEPLOYMENT


TURN 1

Rolands first activation was Cersei, targeting my Crossbowmen with a panic check with a -3 which I rolled badly on, which cost me 6 crossbowmen. I added some tactics cards while Pycelle allowed the Mountain and his halberdiers and advance


Turn one was a quick march to the centre. The fake lannsters led by the Mountain took the right objective, but my cavalry took the left. Unfortunately, the right one only gave conditions when scoring, my left one was immediate and I was able to nullify Cersei...


Still, her earlier influence and damage had injured my pride, and I rather stupidly opened fire with my last activation (My Cersei taking the free attack slot and allowing my Crossbowmen to target the Lannister Guards that were just in range). I killed one, then he passed morale triggering Lannister Supremacy... I didn't really think it through, and the resultant snake eye took off my unit!!!


TURN 2

Having hamstrung my forces by wasting my numerical superiority on the left, my first activation was to charge the Knights of Casterly Rock in the bottleneck. That would protect my line and effectively keep the Mountain and Halberdiers away from the battle. (At this point I had totally forgot he would be scoring to Victory points per round as they were on an objective)


Roland had Pycelle take the movement spot, weakening my Halberdiers and allowing his Mountains Men to move onto the centre objective. I influenced them with Cersei, forcing a -4 morale check which they failed but only lost one man due to the Guard Captain in there. Jaime and his Halberdiers struck weakly due to Pycelle,  but did leave their flank open to entice a charge to allow my Cavalry to hit home. Sadly, Roland didn't fall for it and retreated his guardsmen back


The Halberdiers with the Mountain tried all sorts to allow the Knights to retreat, but they were effectively blocked in and decided to sit on the objective (as that was all they could really do)


As battle had been well and truly joined, I didn't take too many pictures but to summarise. I lost my Guardsmen to the Clegane Men, my Knights wiped out the Cleganes Men, Jamies Halberdiers were decimated by Cersei giving extra attacks on the Guardsmen and influenced Lannister supremacy (and embarrassingly ignored by the other unit of guardsmen who headed for the objective), while my guardsmen were awesome in slapping down some Knights while Tyrion allowed Jaime to retreat...


End of tactics board for turn 3


Jaime runs away...


VP's end of turn 3. Roland has 7 VP's to my 2 VP's

TURN 4

In a desperate attempt to save Jaime and his unit, the cavalry activated first and charged ineffectually into the nearest guards. Sadly, this allowed Roland to use Cersei to influence and steal the crown, panicking Jaime off the board.


This pushed Roland up to 8 vp's and with the Mountain being immovable, Roland had the game won. But undeterred, we carried on. Tyrion healed up my cavalry while allowed the Lannsters cavalry to retreat Pycelle, while my Cersei influenced the Knights and allowed a free attack with my Knights. Rolands Knights then charged back in.


On activation I used Hear ME Roar card, and Roland failed to stop it even with a reroll using Counterplot.


But despite the huge negatives, Roland rolled a pair of 6's to survive...


However, not only did Roland fluff his attacks, my Guardsmen savaged them back, and he badly failed his panic test and the two Knights were removed. My Guards then moved up to give the Mountain a charge while remaining on the objective (as Roland wouldn't have left the objective anyway and his second guards had marched onto the left objective.


End of turn 4, Roland's Lannister's 11 VP's, my Lannisters 4 VP's


That was a really good game, full of mistakes as we're both still learning but played with the right spirit and gung ho attitude needed in the big central melee. I didn't learn the importance of understanding the mission, which given Game 1 I really should have, as leaving the Mountain to rack up 6 points over 3 turns was folly. My bottleneck plan and Roland's deployment error actually worked out well for him in this. Added to this, his use of Guard captain in his Mountains Men reduced my ability to deal with him quickly via Cersei and Lannister supremacy, which I could have done with in my Crossbowmen. Add in the stupid mistake of targeting Lannister Guards with my crossbows when half strength, well, just compounded the way the game panned out.

GAME 3 The Winds of Winter v Gerry Brawley's Night Watch

The Winds of Winter involves each side getting two "Secret mission" cards at start which shows how to score Victory points as of turn 2, and also an open mission. 5 Objectives are placed but are only used for mission specific victory points. Terrain wise, left to right we had marsh, corpse pile, then two palisade (as I tried to replicate the bottleneck but to my benefit this time)

Gerry's force was as below led by Jon Snow with Ghost, far left, then sworn brothers, Jon in veterans of the watch, 2 units of sworn brothers and then ranger trackers, with NCU's Amon and Bowen Marsh.

I deployed with Guards far left, Knights, Jaime & the Halberdiers, Crossbows and Guards on my right. Nothing happened turn 1 other than moving..

End of Turn 1 below.


Turn 1 NCU board. Showing this as both my secret missions (Gerry's cards, dealt and shuffled by Gerry) were NCU cards. As of turn 2, I could score by 1 VP by activating but not claiming a spot on the board, or by taking the moneybag and free move, and if took both I would get 3 VP's. With Tyrion on the envelope, I had six good cards in my hand end of turn 1...


Turn 2

As Gerry had activated first this turn, he took the free move to advance a unit onto centre objective so I figured I just wouldn't activate my NCU's and get two points on board. Gerry then over extended with Ghost up behind my lines, so I gratefully took the chance to bring my cavalry back and smack the wolf. Gerry burned a card to keep Ghost alive on one wound.


Tyrion and Cersei did nothing this turn except put me on the VP trail


I held back as the Nights Watch gathered in strength along the centre of the board...


Jaime and his Halberdiers were facing off against 3 units, as the Crossbows took out quite a few Sworn brothers due to poor saves and poor panic check..


The Watch hold the centre as Ghost holds down the Lannister cavalry...


TURN 3

I activated first and took the free movement to move my left guards up onto the extreme of the board. The Sworn brothers there charged in as Gerry had a mission to gain VP's per charge and as the Guards held off and  I had the one outlined earlier for NCU's to take moneybag and horse, Tyrion too the moneybags and healed the far left guards. and scoring me 3 VPs. I also played on Jaime's Halberdiers my other mission which gave me a VP every time they were attacked but not destroyed as figured it was coming. The Open mission was to have 3 enemy units with the same condition, but I didn't think that was likely...


The Crossbows had been really effective reducing the right sworn brothers right down


Jamie's Halberdiers charged the Sworn brothers in front,  not doing much. The Sworn brothers then activated and I played a tactics card from the Kinglsayer, "Kinglsayers Renown" which weakened and panicked the  sworn brothers, who attacked but didn't destroy me, scoring me another victory point


As the left units battered away at each other,  my knights finally killed ghost, while Jon Snow (in his grief) and his Veterans activated to charge the Halberdiers flank. I played "Kingslayers Renown" again (as Tyrion had gifted me both) weakening the charge and also panicking them. However, the Veterans had a card/vow that allowed 10 attacks hitting on 2+, so all hit. I used the weaken token, though was tempted to take the hits and lose my whole unit, but that didn't seem right. Still, the Veterans still managed 10 hits, in my flank. I failed to make enough saves, so Jaime and his halberdiers were destroyed, much to my glee...


As Jaime and his men were removed, and the Veterans spun round to face the Knights of Casterly Rock, I played "A Lannisters always pay his debts" tactics card, allowing me to panic and make a unit vulnerable (which was put on the Sworn brother on my left swinging away at my guardsmen)


As mentioned earlier, this gave 3 different enemy units the same condition, scoring me 3 more Victory points...


So far the Mission cards had all been stacked against Gerry but he carried on regardless, with me on 9 VP's and Gerry on 3 VP's. As you can see below, he was royally kicking my butt. His mounted ranger had barrelled into my crossbows and was all over me...


TURN 4

My two new missions were pretty good, as one was for to score a VP for every failed enemy morale check this turn. Accordingly, Cersei activated first and took the crown.


The Sworn brothers on the corpse pile, influenced by Cersei for a whopping -5 test unsurprisingly failed their morale...


Jon and his Veterans did sterling work against my cavalry when the NW charged them...


The tactics board in turn 4 was busy as I tried to move my right guards up


The left wing of my arm was hanging on, as the Nightswatch numbers had swelled to maximum


The free move taken by Tyrion allowed my crossbowmen to retreat and on activation finish off the two remaining sworn brothers...


The left guards are taken out, and the cavalry wont hold much longer


But they wouldn't have two, as with two failed morale checks, the game was over at the end of the turn...


NightsWatch 4 VPs, Lannisters 11 VP's


I felt for Gerry after this game, he had systematically outplayed me in terms of tactics, but the Secret Mission cards allowed me 5 VP's from NCU's in turns 2 and 3 that he couldn't really counter. (I mean the turn after Jon's veterans had wiped out Jaime's Halberdiers, Gerry drew the secret mission of gaining 4 VP's if he killed the enemy commander this turn) Add in the lucky Open mission of 3 same conditions on the enemy in thesame turn and having the right tactics cards gave me a commanding lead. Still, Gerry has played me more than once and knows how lucky I can be. He did nothing wrong but lost heavily and I feel in a competitive tournament setting this mission really is down to the luck o the draw...

So the day ended with the Kingslayer finally getting a win, somewhat fortuitously. Simon from Game 1 ended up in top spot, winning all three games. Will hopefully get to more events down at Board in Brum, as its a great venue and has a really good ASOIF throng playing...