As a 35mm fantasy game, it's got great models, great setting (fluff) and excellent tactical gameplay...
The world, its setting, the game, gallery, factions breakdown and more detailed imagery of the models can all be found here...
https://www.para-bellum.com/conquest/
Chris, Andy and I each bought the Core box set, which is exceptional value given the contents. Chris wants the Nords, but they're only just coming out so Andy and I ended up with the to factions in the starter set (I have the 100 Kingdoms, Andy has the Spire).
The Core set and contents...
We had a few games last year when we first got it, but are looking to go full throttle this year with the game. So we took our figures up to the Ribble Warriors in Preston
https://www.facebook.com/groups/9961874990/
We settled on 1000pt forces, with my 100 Kingdom having two warbands consisting of a Noble Lord with 4 Household cavalry, and two groups of 3 stands of Men at Arms...
My second grouping consisted of 5 Men at Arms stands led by my Warlord, an Imperial Officer (using a stand in from the Steel Legion leader) and 2 units of 3 groups of Crossbowmen.
The Steel Legion Officer and Standard bearer (or my commander, an Imperial Officer)
My Noble Lord with his Household cavalry...
As I said earlier, Chris is planning on the Nords faction (think Viking, with trolls and giants). But he couldnt wait so invested in the Dweghom (think Dwarves).
Chris had a Hold Raegh as warlord, in with 5 stands of Hold Warriors, with an additional unit of 6 stands of Hold Warriors. In support he had a Tempered Sorcerer (fireball throwing mage) and two units of 3 Hold Ballistae. All his units had leaders and standards.
The scenario we played to re-jog our rules memory was straight forward, with points scored for holidng the battlefield (2 points after turn 3 for central objective, 1 point for each of the two flank ones). The game would last for 10 turns, but was more about re-establishing the rules.
One of the most interesting deviations from the "norms" of other games is the unit classifications as Light, Medium and Heavy and that no units start on the board. On turn 1, both sides roll a dice for their Light units, and can advance them on with a 3+ roll. No other units can come in (think scouts).
In Turn 2, Lights auto come on, and Mediums are on a 5+. Turn 2, Mediums 3+ and Heavies 5+, and so on with everything auto on by turn 5. Also, your follow on units can start deploying where the rear of the advance are, so they are not traipsing on from the board edge. This allows a good scouting force to gain an advantage.
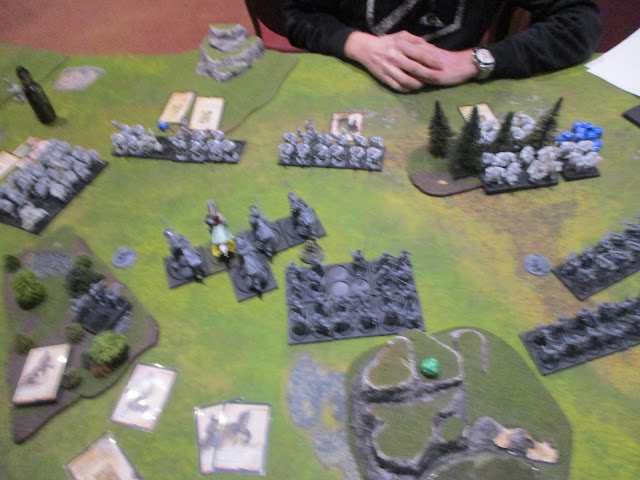
The combinations of two units of Dweghom crossbows had decimated my left flank crossbowmen. All units activate by using their unit cards, which you organise in the order you want them to activate. Needless to say, this gets very tactical as there are more units on the board/ Units can make 2 activations, but the only activation they can do twice is move (essentially march). They can move, fire, fight, charge (move +D6) and also inspire. Inspire allows plus 1 to hit in melee, aim is the same for shooting.
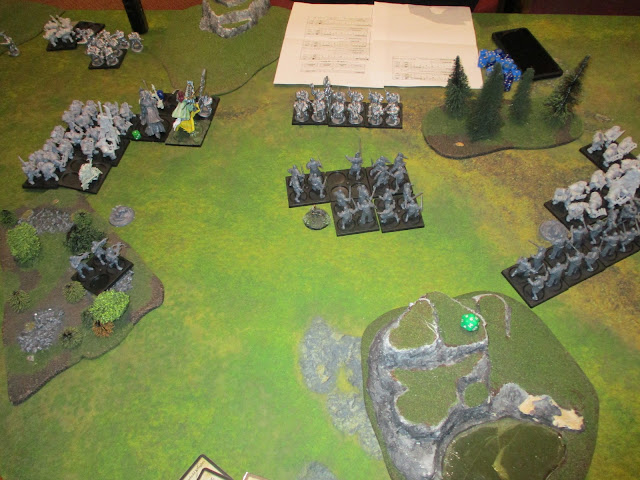
In Turn 3 the Dweghom still only have their two lights on at the start while I had 3 units. I also got all my medium units on, as did the Dweghom. My first activation was to bring on a 3 stand Men at Arms group and advance them through my right crossbows...
As the sequences progressed, I had advanced my right crossbowmen up only to find a horde of Hold Warriors stream up and out of the woods...
My cavalry led by Noble Lord deployed and sped up the centre, while my Officer led the Men at Arms up to the centre objective (worth noting the Men at Arms and all the Dweghom troops come with shields which we've left off to allow ease of painting)
Having made my charge next turn obvious (as you charge in a straight line), the Hold Raegh led his Warriors on from the flank to allow them to flank my charging cavalry if I carried it out...
You can see the trap the Dweghom had set...
Still, my Noble Lord could not really resist lancing that Tempered Sorcerer, could he???
On my right flank, the crossbowmen fired a volley at the Dweghom doing a bit of damage...
My Household cavalry and Noble Lord charged into the Dweghom Sorcerer and his Hold Ballistae
The Dweghom Raegh and his troops negated some of my defence due to hitting my flank, and my cavalry force was smashed...
My Men at Arms had to reform before charging, which meant they could not attack this turn, but aided the crossbowmen nonetheless...
The 100 Kingdoms forces still held the objectives in the centre and right and had racked up enough points to win the game (as you also draw three objective mission cards and I had achieved 2/3 while Chris hadnt scored any).
My Lord and Knight finished of the Tempered Sorcerer by killing the unit (the Hero goes down with his men, or Dwegs in this case). However, as well as the unit cards being placed for activations, so too does your characters as when they are drawn they can do their own activations (they also act with their accompanying units). So the Sorcerer can throw Fireballs, for example, while more fighty characters can issue challenges!
The Dweghom Hold Raegh's duly did and my Noble Lord accepted... The big axe should have given me a clue!!!
The Dweghom Warlord chewed through armour, flesh and bones, where as I couldn't scratch him (duels are generally simultaneously, though items/skills can give advantages)
However, on the rights my Men at Arms were inspired and cut through the Hold Warriors, partly due to really poor resolve (panic/morale rolls)
In the centre, my Imperial Officer and his troops cut through the light Hold Balistae unit...
while the lone Knight clung on in desperation, holding the Dweghom advance...
Having slunk around at the rear, my second small Men at Arms unit advance up to support
The Dweghom finish of the Knights...
But the Hold Warriors on the right prove resolute, surviving multiple attacks over several turns. My Men at arms charge the Hold Raegh's unit, doing some damage...
which ony serves to infuriate the Raegh and his boys, who literally tear the Men at Arms apart...
As the Imperial officer's unit squares up to the opposing Warlord troops, the two Dweghom on the right still hold on
Combat ensues as the Dweghom charge in...
The result of the duel was kind of expected (as my Imperial Officer isn't as good a fighter as the mounted Noble Lord and he went down like a sack of spuds!!!)
The game was over long ago in "technical" terms with the 100 Kingdoms winning handsomely on points, but the moral victory certainly went to the Dweghom Hold Raegh who annihilated everything he and his unit of Hold Warriors touched...
A few examples of the figures I mentioned
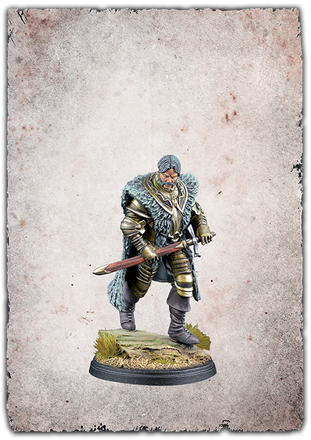
100 Kingdoms: Noble Lord on Foot
Nords: Jarl
100 Kingdoms: Chapter Mage
Dweghom: Hold Raegh
Nords: Raiders
Nords: Mountain Jotnar


No comments:
Post a Comment