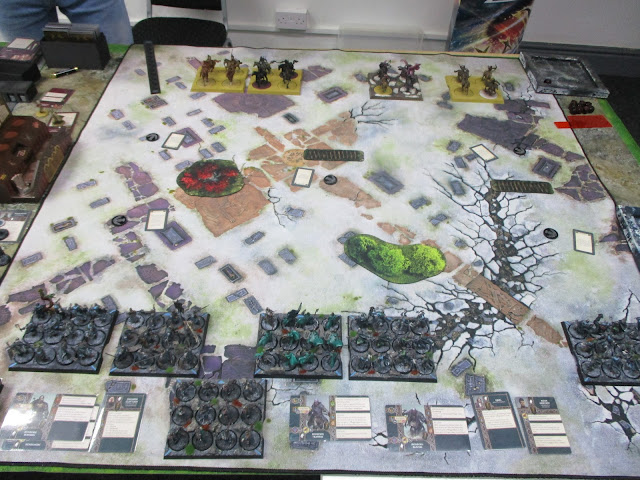
January 22nd/23rd saw four of us Wardens of the North-West gamers head North of the Wall to Always Winter 2022, organised by John Craig and held at Common Ground Games http://www.commongroundgames.co.uk/ a superb store and excellent gaming venue in Stirling. Greg (Greggers) ran Lannisters, Ste (PsychoSte) ran Starks, while myself and Andy (Lord Robbo) ran Greyjoys...
First off, Kieran "Scaddman" Scaddan is holding a 24hr sponsored wargame of ASOIF in aid of Veterans mental Health charity.
Link to his Justgiving page is HERE
Kieran's a great lad, and not a bad player either (allegedly) so please donate if you can...
So for the event, I opted to take a relatively fluff and themed pair of lists, as outlined below:
"The Kingsmoot at Nagga's Hill, OldWyck"
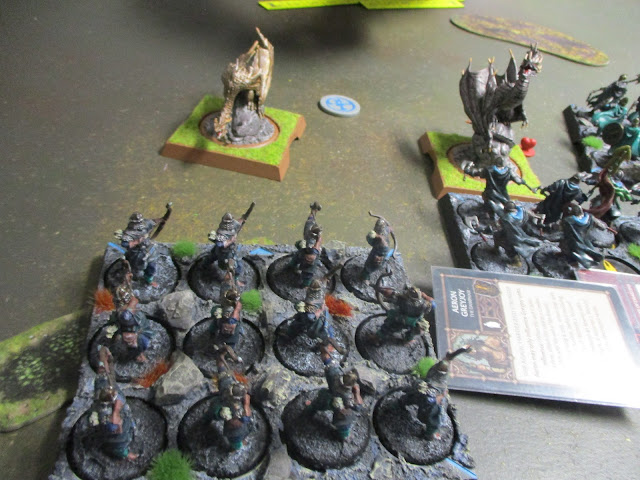
Following the death of Balon Greyjoy, the captains of the Iron Isles have been called to a Kingsmoot by Aeron Damphair to select a new King to lead them in the wars to come
Lord Farwynd, Eric Ironmaker and Lord Drumm have set out their claims, but their support is weak compared to the Greyjoy family claimants. Victarion has spoken and is well supported but Asha, in addition to humbling old Eric Ironmaker, has managed to garner enough support to evenly split any vote by the Iron Island captains at the Kings Moot. Enter Euron Greyjoy, outshining them all with the promise of not just conquering the North, but conquering the world with the three dragons his infamous Horn will bring...
Asha has no choice to flee, as Euron will shackle her in marriage to Eric Ironmaker, so she gather her crews and heads to Westeros...
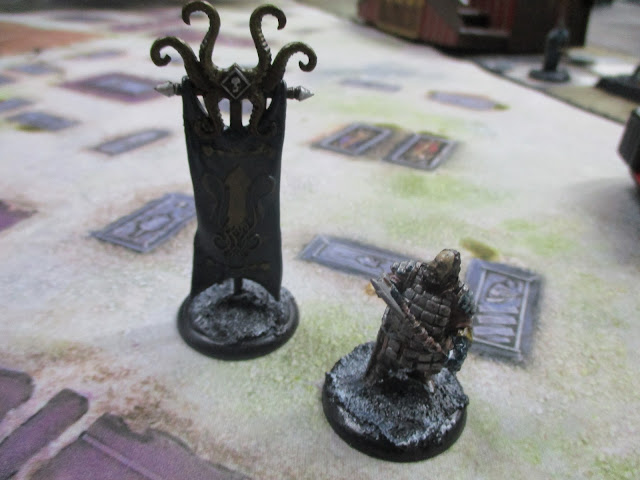
I specifically designed the forces for the fluff, including a minor conversion for one Warsworn to represent Asha's companion, Harras "The Knight" Harlaw . As he is not technically Greyjoy based models (Lannister) I have a proper Warsworn should anyone object. Another factor for the forces was the wee board for display I made for these forces...
Nagga's Hill, Old Wyck
The Kingsmoot...
Side on view of the crowded hill...
I have kept both forces fully Greyjoy to better reflect the theme (although I did toy with including Tycho Nestoris as he did meet with Asha after she had fled the Kingsmoot). But it didn't feel right, as he wasn't at the Kingsmoot.
Day 1 List Asha, The Kraken's Daughter
Rodrik: "Your fight is hopeless."
Asha: "No fight is hopeless till it has been fought. I have the best claim. I am the heir of Balon's body."
This represents Asha and her three besotted companions (2 attachments, 1 NCU), Qarl (as himself), Harras "The Knight" Harlaw (Warsworn conversion,as below) and Tristofer Botley (NCU). Aided from afar by her Uncle (on her mother's side) Rodrik Harlaw (Harras's cousin) and Tristofer Botley.
Qarl "The Maid" and Harras "The Knight" both love Asha...
Harras Harlway’s personal sigil is quartered: a silver scythe on black, a peacock on cream. The scythe is from his Harlaw father and the peacock, the blazon of House Serrett is from his mother.
Asha's list is complex and not optimised to reflect the ad-hoc and hot-potch mix of support The Krakens Daughter has. It will be looking to get more VP's in its three games from day 1 than Victarions List on day 2...
Combat Units
• Ironborn Trappers (4)
Asha Greyjoy - The Kraken's Daughter (COMMANDER)
Qarl - Asha's Champion (1)
• Ironborn Bowmen (4)
Reaver Captain (1)
• Ironborn Bowmen (4)
• Ironborn Reavers (5)
• House Harlaw Reapers (6)
Harras Harlaw Warsworn (1)
• Ironborn Reavers (5)
Warsworn (1)
Non Combat Units
• Rodrik Harlaw (4)
• Tristofer Botley (4)
Day 2 List, Victarion, The Iron Captain
This represents Euron dispatching his brother to hunt down Asha and her supporters and bring her back in chains to Pyke. Far less subtle and nuanced than Asha's mixed bag, its a straightforward and uncomplicated raiding force to reflect the Iron Captain's direct style. With his trusted Nute as the only attachment, and supported off shore by his brother Aeron the Damphair and Wendamyr, the Maester of House Greyjoy. If this force scores more than Asha does on day one, Victarion will have carried out Euron, the Iron King's, command.
"Victarion is like some great grey bullock, strong and tireless and dutiful, but not like to win any races. No doubt he'll serve me as loyally as he has served Balon. He has neither the wits nor the ambition to plot betrayal."
Combat Units
• Blacktyde Chosen (7)
Victarion Greyjoy - The Iron Captain (COMMANDER)
• Ironborn Reavers (5)
Nute - The Barber (1)
• Ironborn Reavers (5)
• Ironborn Reavers (5)
• Ironborn Reavers (5)
• Ironborn Bowmen (4)
Non Combat Units
• Wendamyr (4)
• Aeron Greyjoy (4)

GAME 1: A Game of Thrones v Fraser McWhirter, (Greg) Lannisters
Combat Units
• Lannister Guardsmen (5)
Tyrion Lannister - Halfman (COMMANDER)
• Lannister Guardsmen (5)
Assault Veteran (1)
• Gregor Clegane - The Mountain That Rides (4)
• Knights of Casterly Rock (8)
• Pyromancers (7)
Sandor Clegane - The Hound (1)
Non Combat Units
• Petyr Baelish (4)
• The High Sparrow (4)
Enemy Attachments
• Jaime Lannister (1)
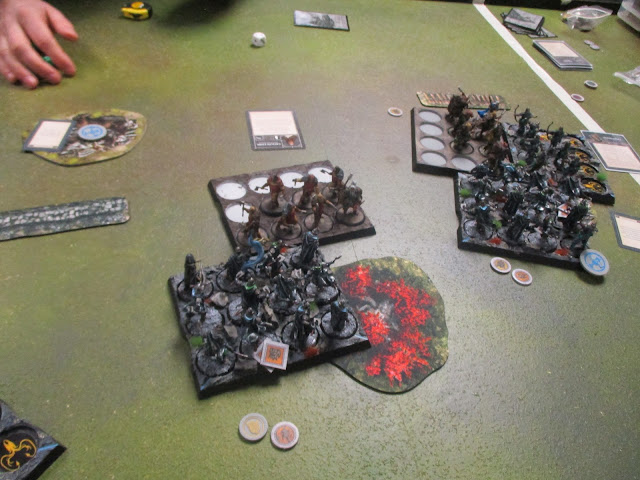
Fraser was down from the Aberdeen group, and was a great opponent. He set up with the Mountain on my left, Guardsmen with Assault veteran, Pyromancers with teh Hound, Guardsmen with Tyrion and Knights of Casterly Rock far right
Random terrain saw 5 pieces, a hedge and stakes on the left, Weirwood tree centre left, woods and bog on the right.
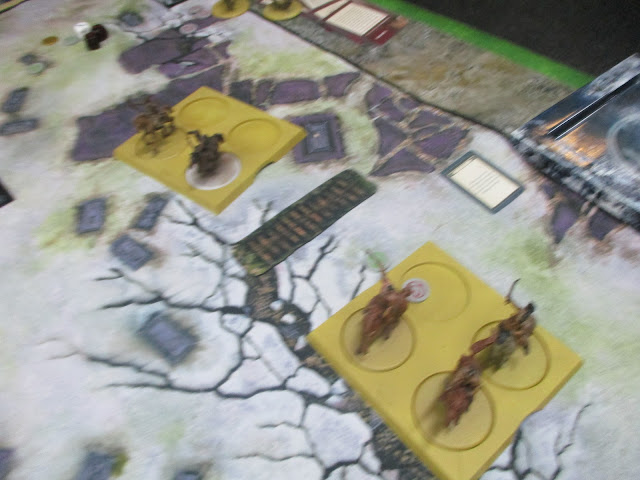
I set up with two reavers on the right with bowmen behind (as chose not to outflank), bowmen central, Harlaw Reapers with captive Jamie and Trappers with Asha on right...
TURN 1
Frazer took second turn with the High Sparrow taking the horses to help his slow Guardsmen up the board, as I had took the letters to see if it was worth trading with Rodrik's ability, but my hand was actually quite good. I moved up Reavers on my left. Next down was Baelish on the crown, using it to target my bowmen with poor leadership.
And they aced it, good to get some nice dice out first roll...
End of Turn 1, with me having to swing Asha and her Trappers in behind centrally to avoid Knights and also aid with her leadership.
TURN 2
The tactics board filled up first, with me manovering and healing, while Fraser took the Letters first activation and then hit my bowmen with another crown attack.
But again, my bowmen were solid...
Which is more than can be said for my Reavers!!! They took the Mountain that Rides in teh face for 4 wounds, then rolled the panic check below...
That's quite an intimidating presence to be sure!!!
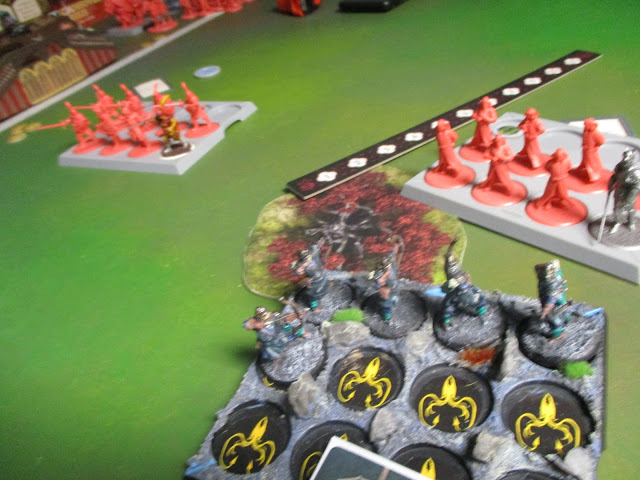
Whilte the Halfman and his gaurds had aslo got stuck in, as I had moved my Harlaw Reapers up onto block the centre objective, my Reavers with Warsworn also got Wildfire bombed, losing four models to the grenades
But no more thanks to some quality rolling again...
Asha moved back to threaten the Knights should they flank the Reapers, while the Bowmen charged the mountain, whose armour didnt save him on account of all my attacks missed...
END OF TURN 2
HOUSE LANNISTER 1 VP (1 objective)
HOUSE GREYJOY 0 VP's
TURN 3
Using the swords, I moved over onto the objective (for Sundering) and cut down more Guardsmen than Reapers I'd lost claiming a pillage token.
Fraser then took the crown and dropped 2 archers centrally
So I activated the 4 remaining reavers on my left fighting the Mountain before he ate them. (admittedly I doubled their number with Radining call and surprsingly, from the 3 hits with sundering, I caused two wounds. They had moved onto the objective in turn 2 but Mountain contested. And unbelivably, the mountain was levelled. (The shaky picture tell you how happy I was)
Tyrion activated shifting across and attacking my Reapers...
But luck was with me this round as I saved all four hits...
I attacked back with the Reapers and dropped them down to a single rank, the halfman was in trouble. But Sandor and his Pyromancers were burning through my Reavers quickly...
I had Asha and her Trappers charge the Knights as they'd moved up with the horses tactics board. I auto-wounded with Qarl but that was it...
I then retreated left with my sole Reeaver (with Warsworn) and failed a charge into the Pyromancers (I misjudged, thinking I was within 6, but I was actually 8 away as had checked for shooting earlier in round). I lost tow to panic.
END OF TURN 3
HOUSE LANNISTER 1 VP's (1 objective)
HOUSE GREYJOY 3 VP's (2 objectives, 1 unit)
TURN 4
Fraser activated and charged the Pyromancers into the bowmen, who were incinerated, as the battle heated up. As you can see from Frasers dice, his Pyromancers were also getting hot under the collar!!!
The Reapers finished off the Guards with Tyrion, and moved onto face the Knights flank, as I was up first next round. The Trappers nets kept the Knights respectable as Qarl plinked wounds off them. The Guardsmen on my left finished off the sole Reaver, and were subsequently charged by my left reavers, who lost more men to lannister supremacy!!!
END of TURN 4
HOUSE LANNISTER 3 VP's (1 objective, 2 units)
HOUSE GREYJOY 5 VP's (3 objectives, 2 units)
TURN 5
I claimed the swords to plink some wounds off the Pyromancers, while retreating with a shift and healed also, while Fraser took the horses and crowned my archers again...
And I passed with Weirwood tree they were sat on.
I flanked the Knights with the Reapers, who were obliterated (helped by Qarl auto-wounds and woundign every time Asha passed morale). On the left, my reavers somehow survived with 1 man, who sheepishly retreated out of combat to secure the objective and not die! Asha and the Trappers were free to move onto the right side objective..
END of TURN 5
HOUSE GREYJOY 9 VP's (3 units, 6 objectives)
HOUSE LANNISTER 5 VP's (2 units, 2 objectives)
TURN 6
The Guardsmen on the left would charge in, wiping out my reavers and taking the objective there. But the bomwen loosed at the Pyromancers
Scoring an impressive 6 hits...
But Fraser save 3, passed his morale and went mental... My panic check ended the bowmen!!!
My right side units consolidated the objectives, while the Hound held the centre and the guards took the left
END OF GAME
HOUSE GREYJOY 12 VP's (3 units, 9 objectives)
HOUSE LANNISTER 9 VP's (4 units, 5 objectives)
An excellent start to the event, and not becuase I'd had a win but because Fraser was great to play against. Pretty chilled, and the pyromancers simply would not die. Fraser didnt use his Knights to much effect, but then I was tooing and froing with Asha as didnt want her out on the right on her own and needed to concentrate around her in the centre. Glad to see the Bowmen passing morale (although they both died) and the Reapers with Harras Harlaw (warsworn) were rock!!! Close battle...
Game 2: A Dance with Dragons, Alan Bainbridge (TechNeqe) Targaryen
I'd played Alan second game at the Ribble Rumble in December, oddly enough, the same scenario and his list was the same. and mine was only slightly different, so I knew this would be tough. He is undoubtedly the most average player of the Dead Meta crew (sorry Alan, Nigel made me do it!!!)
Drogo the Destroyer List
Combat Units
• Dothraki Veterans (8)
Khal Drogo - The Great Khal (0)
• Dothraki Veterans (8)
• Dothraki Screamers (6)
• Dothraki Outriders (6)
Non Combat Units
• Daenerys Targaryen (4)
• Illyrio Mopatis (4)
• Tycho Nestoris (4)
Set up: Again 5 pieces of terrain, left to right:Woods bottom left, corpse pile, wall, Weirwood and corpse pile. Alan set up with Screamers on my left, Drogo in "white veterans", Outriders and right Veterans "white leader"
In December, I was simply outmanouvered, so i planned to rush the objectvies and try and get into a war of attrition. I set up with Bowmen on both flanks, Reapers on left and Asha and Trappers between two Reavers
TURN 1
Tactics board filled up quickly, with Alan on letters fist, me on horses (moved the bowmen on left up), crwon attack on a unit, then Rodrik swapping zone for token, before Daenerys took swrods for no effect.
END of TURN 1
My plan lacked subtlety, but I had a plan which is always a start...
TURN 2
Taking the swords, the Outriders casued one wound on Ahsa's Trappers, but I passed the panic.
Taking the horses, Asha then moved ont the central objective, tempting Alan with a Drogo charge and assassination. I wont lie, I had forgotten he had expert duellist, but i wanted Alan to be reacting to me, not the other way about...
On my right, the Reavers with warsworn also took the objective there
On the left, the Screamers had charged into the woods to kill seven bowmen, before they in trun were flanked by my Reapers, reducing them down by six wounds...
The opportunity for a flank charge was more appealing to Alan, and Drogo went into the flank of the Reapers, killing 5 on the charge...
And a further 3 with the panic. Still, the bowmen swung at the Screamers
And fluffed their meagre attacks.
Activating off Assualt orders, Drogo wiped out the Reapers and surged forth onto the objective on the left. He had also popped tycho to heal up his Screamers. On my right, Alan was sticking to his plan of attacking my weaker wings and made a 4+ charge over corpse pile to hit the bowmen head on...
I failed all possible saves...
And used We do not sow to all Rodrik to get the bowmen to attack,
They did a few wounds, and the Veterans retreated
END of TURN 2
HOUSE TARGARYEN 3 VP's (2 objectives, 1 unit)
HOUSE GREYJOY 3 VP's (3 objectvies)
TURN 3
Activating off the Swords, I unleashed my bowmen at the veterans, doing one hit...
But it did wound and I had made the unit vulnerable with Fingerdance...
The game was still finely balanced...
Alan shot with his Veterans, but didnt hit before charging in again against the bowmen, killing them, but with What is Dead May never die they survived... I activated Rodrik to allow my nearby Reavers to move back...
And be in a position to flank the Veterans...
Which they duly did, in impressive style...
Down to 4 wounds before panic, and with the coprse pile and flank...
One wound left. And due to the angle of melee, no room to retreat!!! It wasnt really a cunning trap, just lucky...
So, to re-show an image from a few minutes earlier, where the game was finely balanced, I'd just hemmed in and trapped his Veterans on right and was feeling good!!!
Then this happened!!! Outriders opened up and dropped 7 Trappers!!!
And failed the panic, despite needing a 4+
And Alan hadnt finished, as Drogo charged into the Bowmen, wiping them out, Freeing up the Screamers...
Who then moved up and screamed into the Reavers as Asha and the Trappers futiley tried to withdraw...
END of TURN 3
HOUSE TARGARYEN 6 VP's (4 objectives, 2 units)
HOUSE GREYJOY 6 VP's (6 objectives)
TURN 4
Alan had first acitvation, and couldnt contain his excitement. Daenerys on the swords...
Screamers attack Reavers, killing them...
Takes the objective from them, and plays Overrun!!! Into the trio of Asha, Qarl and a sole Trapper who were crushed under hoof in short order....
Ach well, cavalry can do that!!! I activated the Reavers who finsihed off the veterans
And turned to face the Dothraki horde...
A crown zap on the Reavers...
And they dropped the objective on another pair of ones...
They then took a charge from the Screamers...
And would have lost 6 men, but it was the final play of the game so I didn't remove them...
END OF TURN 4 (and GAME)
Anotehr excellent game, I thought I was in control midway through turn 3, but superb play by Alan brought his Screamers from being engaged on the left near end of Turn 3 to being engaged on the right havign ploughed through my centre. Great card combination, and those seven hits on 4+ to weakenthe trappers was what really did for me. Well deserved crushing victory for Alan, he's definitely a very good player Nigel!!!
Game 3: A Feast for Crows, Nick Karasek (Nickk88), Starks (and Tully's)
Combat Units
• House Mormont She-Bears (6)
Brynden Tully - The Blackfish (COMMANDER)
• House Umber Berserkers (6)
Mormont Veteran (1)
• House Tully Sworn Shields (6)
• House Tully Cavaliers (8)
Non Combat Units
• Eddard Stark (5)
• Tycho Nestoris (4)
• Catelyn Stark (4)
Nick was another Aberdonian, bring an evil list of Starks and Tully's. That's not fair, it's a good list but Tully's have been the bane of my gaming for most of last year!!! Nick's list was similar to ones I've faced by Ste over at Justplay, and I knew this would be another tough nut to crack.
Nick set up with Tully's Shields on my left, with Tully Cavaliers next to them, and Umbers and Mormont She-Bears.
With the two corpse piles, we rolled 4 other pieces of terrain, palisade on my left, wall centre, Weir wood centre right and stakes Nick side on my right.
I deployed bowmen on my left, Trappers with Asha next to them, Reavers with Warsworn, Reapers and Reavers far right. I kept my Bowmen to outflank, as the Cavaliers were too far from my right to hurt them when they'd come on from my right.
TURN 1
I took the Horses and brought the Ironborn Bowmen on from the right to get at the objective. Nick took the letters and my bowmen were targeted by the crown as well, and lost two men.
I advanced en masse centrally, as I knew I'd need numbers to deal with the brutal Bears and Umbers...
The Tully's advanced down my left, as I consolidated centrally...
End of Turn 1 tactics board...
TURN 2
Nick took letters and I activated off the swords to fire my right side Bowmen into the flanks of the She-Bears. It was ineffectual. Nick countered with the Tully's into my left bowmen, who lost men to the lances...
And Asha's proximity meant nothing for the panic...
I opted to retreat off the horses, and then shifted to get in behind the palisade, as the Tully Shields took the objective on the left.
And then we got messy. Brynden and the She bears advanced up, I tried a charge and failed with Reapers and got flanked by Umbers as you can see below...
I got blurry again with excitement, as my Reavers flanked the Umbers, and started to learn how good Eddard NCU is, either auto-passing morale or healing 2 per token. I also dropped a Cavalier with a flank shot from the Bowmen. I also charged the Tully Knights with Asha and her trappers, to avoid getting charged next turn.
END OF TURN 2
HOUSE STARK 1 VP (1 Objective)
HOUSE GREYJOY 1 VP (1 Objective)
Off the swords, I lost 4 Trappers to the Tully's...
As we got stuck in, Brynden charged the bowmen but fluffed due to the corpse pile, I flanked with Reavers into Eddard after the Umbers cut down the Reapers (and placed copse pile behind them). The Cavaliers retreated to avoid being shot by my crown zapped left bowmen, who I then had charge in to hold up the cavalry.
END OF TURN 3
HOUSE STARKS 3 VP's
HOUSE GREYJOY 2 VP's
The right side was fully in melee mode at the start of the turn...
Catelyn on swords first saw the Umber Berserkers batter my Reavers, but they hung on grimly...
While my Reavers hacked into the vulnerable She Bears and Brynden (who had been Tycho'd)
And I do believe he failed a morale check too. (Eddard had ran out of tokens)
Hard to shift are Starks!!!
I took the crown to deny its use on me and swapped it out for we do not sow...
And as night fell, the still vulnerable She-Bears were hacked down along with Brynden Tully...
END OF TURN 4
HOUSE STARK 6 VP's (3 objectives, 3 units)
HOUSE GREYJOY 6 VP's (5 objectives, 1 unit)
Battlefield at end of Turn 4
TURN 5
I opted to charge the rear of the Berserkers with Qarl and the Trappers, and I managed to wipe them out (assassinating the Mormont Veteran helped). The Tully Cavaliers came crashing into Asha but they held, and I sent the Reavers over towards the other objective, as I edged ahead
End of Turn 5
HOUSE STARK 7 VP's (4 objectives, 3 units)
HOUSE GREYJOY 8 VP's (6 objectives, 2 units)
Well this is how it unfolded. Catelyn on the Swords saw the Tully Cavaliers swing but fail to kill Asha and the Trappers, due to nets. I took the bags to heal. The Cavaliers activated and wiped out the Trappers and Asha, but I had What is Dead may never die and came back with 3 wounds, passing the panic check. Fearing Assault orders, I used horses to retreat, staying alive with 1 wound. (It was a good call, as Nick did have Assault orders). I then used The Iron Price to get back to 3 wounds and activated Asha and the trappers to move onto the corpse pile and claim 2 more VP's. Sadly, I rolled a 3 on the D3 wounds, and the unit died. Bugger!!! And then Nick seized the Crown, I failed the panic and I dropped the objective on the far right...
Seizing the objective with Reavers was no solace, and the game ended...
HOUSE STARK 9 VP's (5 Objectives, 4 units)
HOUSE GREYJOY 9 VP's (7 Objectives, 2 Units)
HOUSE STARK WINS WITH MORE POINTS ON BOARD!!!
AND WHAT TWO UNITS WERE LEFT? YEAH, TULLY's!!!
Have to say that was a fantastic game, nothing much to separate us after 6 turns, Nick was really great and we were both nice and chilled in our approach. Eddard NCU kept the Mormont She-Bears alive for so long, but Reavers in the flank eventually got em... If all games were like this, I doubt I'd ever play anything else. Can't praise Nick enough, great opponent even if he did rob me at the bitter end. I bloody hate Tully's!!!
INTERMISSION
Saturday evening saw 30 players hit a local Indian for a proper feast (including some quality pineapple juice, in a pint glass, topped up with lemonade). And more food than normal folk could eat!!! Well done to Connor Kerr (Belgeroth) for organising, again, no easy feat given the ever changing Covid rules.
READY FOR DAY 2???
VICTARION TAKES TO THE FIELD
Combat Units
• Blacktyde Chosen (7)
Victarion Greyjoy - The Iron Captain (COMMANDER)
• Ironborn Reavers (5)
Nute - The Barber (1)
• Ironborn Reavers (5)
• Ironborn Reavers (5)
• Ironborn Reavers (5)
• Ironborn Bowmen (4)
Non Combat Units
• Wendamyr (4)
• Aeron Greyjoy (4)
Day 2, Game 4: Honed & Ready, Adam Harbison (Harbo1993), Neutrals
 Combat Units
• House Bolton Blackguards (6)
Roose Bolton - The Leech Lord (0)
• House Bolton Blackguards (6)
Bolton Flayer (1)
• House Bolton Bastard's Girls (7)
• Stormcrow Archers (6)
Bronn - The Sellsword (1)
Non Combat Units
• Tycho Nestoris (4)
• Petyr Baelish (4)
• Lord Varys (5)
Combat Units
• House Bolton Blackguards (6)
Roose Bolton - The Leech Lord (0)
• House Bolton Blackguards (6)
Bolton Flayer (1)
• House Bolton Bastard's Girls (7)
• Stormcrow Archers (6)
Bronn - The Sellsword (1)
Non Combat Units
• Tycho Nestoris (4)
• Petyr Baelish (4)
• Lord Varys (5)
Adam is another one of the Dead Meta crew, though I haven't faced him before
We deployed terrain as below, with palisades top left, Weirwood tree left of centre, both placed by me, and corpse pile centre right and spikes far right placed by Adam.
Adam set up with Stormcrows on my left, Blackguard with Flayer, B Girls then Blackguard with Roose
I set up Nute's reaver far left, Blacktyde Chosen with Victarion next to him, bowmen, and 3 Reavers centre to right...
Baelish on bags used crowns, targeting Ironborn Bowmen as seems to be a recurring theme. And near a Weirwood, they passed as seems to be a recurring theme
Tactics board filled up quickly...
End of Turn 1. I'd set myself up ready for Turn 2 given the cards I had, and was well placed to control the fight!!!
TURN 2
(The Turn of Eternal Shame!!!)
So, above, Nute and the Reavers on the far left are facing Stormcrow archers near objective. I declared charge with Rush of Aggression, getting in and crumping some archers, electing to go 50/50 rather than full on as possible flank from Blackguard would have been tempting. Adam retreated the stormcrows away. And I declared a charge through the spikes at them... To which Adam pointed out that it was a palisade... My palisade. I rolled it, I placed it, it was my terrain piece. Add in no impassable terrain was even ALLOWED in this scenario Basic error and sheer stupidity on my part. I had it in my head it was the spikes!!!Adam allowed me to rethink but I simply activated to attack and destroy the palisade!!! Leaving Nute and his Reavers horribly exposed. Still, I took the centre objective.
In the centre, I'd moved up to lure in the Blackguard, and spread out with Blacktyde on left objective and Reavers on right.
Tactics board and END of TURN 2
HOUSE BOLTON 2 VP's (2 Objectives)
HOUSE GREYJOY 4 VP's (4 Objectives)
TURN 3
I activated off the swords to attack the Blackguard in centre (And Adam used Varys token to do 3 hits on Nute, whose Reavers had suffered badly in front of the Stormcrows)
Adam had the Bastard girls hit and move back after destroying a Reaver unit...
Losing two units in short order brought the scores up level, and me on the backfoot...
The Stormcrows were totally untroubled now...
But Adam brought them back over to help in the centre rather than just secure the objective, as the Blackguard were badly mauled!!!
It was looking quite tight on the right and my Reavers were hitting on 2's v the sole Blackguard Flayer next turn!!
End of TURN 3
HOUSE BOLTON 6 VP's
HOUSE GREYJOY 7 VP's
WOW!!! STEWARDS ENQUIRY!!! Adam had been so busy removing Blackguard in the centre he hadn't activated them. No problem say I, go for it. (Nothing had happened and its the way teh game should be played, all's fair in love and...FFS!!! This is just before the dice land...
All 4 attacks hit, I saved one, but failed the panic and the unit was gone... The Sole Flayer advanced onto the central objective!!!
END OF TURN 3
HOUSE BOLTON 8 VP's (5 Objectives, 3 Units)
HOUSE GREYJOY 7 VP's (7 Objectives)
It's fair to say things went a bit pear shaped for me!!!
TURN 4
But I had a cunning plan...
And used Finger Dance and Rush of Aggression for the Critical blow...
The Bowmen against the Blackguard Flayer...
And they passed the Horrific Visage test!!!
I managed 6 hits with the critical blow from 4 attacks!!! And Adam saved them all. Thankfully, they were vulnerable from earlier...
And fortunately he failed two...
Tempting though it was to advance onto the objective, I'd have been shot, and shot and eaten!!!
Adam decided to go for broke and launched a Stormcrow volley at Victarion and his Blacktyde Chosen
Yes, six sixes!!
4 dead...
Victarion and his bannerman left...
Yeah, we kinda figured this was coming!!! The Bastard Girls also moved up and charged the Bowmen, easily wiping them out...
END OF TURN 3
HOUSE BOLTON 13 VP's (8 objectives, 5 units)
HOUSE GREYJOY 9 VP's (8 objectives, 1 unit)
Board at the end of the game
I could dwell on my errors, but this was still a really good game and Adam played it really well (when he'd finished laughing at me). Beyond Nute's cock up, it was still a disaster as the Blackguard's horrific visage just ate my men. My dice were poor too, in short, it was simply one of those game's and Adam capitalised it with a good army. I'd sooner have faced this than the Flayed Men alternative. Adam ended up best in faction with Neutrals...
GAME 5: A CLASH OF KINGS, KEVIN JOHNSTONE, (MarwyntheMage), NEUTRALS
The Skinned Dragon List
Combat Units
• House Bolton Blackguards (6)
Roose Bolton - The Leech Lord (COMMANDER)
• Stormcrow Mercenaries (5)
Ramsay Snow - Sadist (2)
• House Bolton Flayed Men (8)
• Hedge Knights (7)
Non Combat Units
• Lord Varys (5)
• Petyr Baelish (4)
• Tycho Nestoris (4)
Kevin is more into the Lore and fluff of the books than the competitive gaming,
and hails from the west coast like myself...
Kevin had only played Greyjoys the once before, in the preceding game. He'd charged in and lost by attrition...
Kevin kept his scenery placement to the flanks, while I deployed the Weirwood to help my morale and hedge to help slow and Hedge Knights...
I deployed with two Reavers left, Blacktyde and Nutes Reavers centrally, bowmen and Reavers to the right...
Roose and his Blackguard were placed facing me on my left, then the Flayed Men, Hedge Knights and Stormcrows with Ramsey on my right...
TURN 1
Kevin went first and seized the letters, panicking my bowmen. I countered with horses and then Baelish took the bags and used the crown to target my archers...
And true to form, I passed my panic again...
And again when re-rolled...
Turn 1 saw me advance up the board en-masse, while Kevin held his forces back...
TURN 2
Start of Turn I shifted with Nute's Reavers with Wendamyr's token
and charged into the Hedge Knights. Kevin took the horses and retreated out of melee, and the swung around and hit them in the flank a few activations later...
I also failed a charge into Ramsey and his Stormcrow Mercenaries
But again, my panic checks were good.
And I only lost 4 models when Ramset charged into me...
Again, a good roll on the panic...
The Flayed Men failed a charge, as my two Reavers on the flanks took the objectives and the Blacktyde boys held the centre...
END OF TURN 2
HOUSE GREYJOY 4 VP's (4 objectives)
HOUSE BOLTON 0 VP's
The Flayed Men charged Nute's Reavers and they rolled well...
They then fell back, while I took the swords with Aeron to attack the Mercenaries and heal a bit. Kevin used Issue Commands to activate the Flayed Men to charge the Blacktyde Chosen but rolled a 1 and then followed up with some poor dice.
Meanwhile, my Reavers got flanked by the Hedge Knights and got reduced to two men...
Before passing their panic check!!! Awesome!!!
I then activated the Reaver unit with sustained assault and Aeron and they wiped them out, healing me back up considerably. And gaining both pillage tokens...
The Crown was taken by Tycho and used to target the Bowmen...
And again, the dice were kind...
So bouyed up by this, I shot the Flayed Men...
And got 5 hits. Didn't get through the armour mind...
End of TURN 3
HOUSE GREYJOY 8 VP's ( 7 objectives, 1 Unit)
HOUSE BOLTON 1 VP's (1 Unit)
TURN 4
Board was looking good, but I was mindful of what Alan's Targaryen cavalry had done to me. So I used Aeron's influence again on my Reavers...
and took the swords to get them to turn and swing.
The did ok hitting on 2+ with sundering, leaving the hedge Knights on seven wounds
Kevin decided to go for it, smacking the Flayed Men into the Chosen...
Critical blow with 7 attacks translated to 12 hits on my Blacktyde Chosen
who were also Vulnerable...
I lost 8 before the token was spent...
And Victarion was left alone before the panic, which he failed due to vicious and intimidating presence
However, I then activated the Reavers to chase down the Hedge Knights that had retreated, using Rush of aggression to get in and then the Krakens Wrath as both Swords and bags were occupied, meaning I had critical blow and precision, with sundering naturally and the Hedge Knights being vulnerable
They cut down the wandering Knights and advanced to threaten the Flayed men...
The tactics board was closed out with Baelish on the Crown targeting my...
Bowmen again...
And again, they came up trumps...
Board at end of Turn 4
END OF GAME
HOUSE GREYJOY 11 VP's (9 objectives, 2 Units)
HOUSE BOLTON 6 VP's (4 objectives, 2 Units)
A good win as I played the scenario but Kevin and I spent more time talking about fluff, lore and generally nattering away that the game was almost secondary to a right good chinwag. Having been outdone in his previous game, he held back a bit too defensively when I had more units on the board and could gang up a bit. Having seen the Flayed Men one shot the Blacktyde, I think had he played more aggressively I'd have been in trouble. A great guy to play against....
ARMIES ON DISPLAY
Tom Bell Night's Watch
Iain Young's Dothraki Targaryens
Victoria Angelici Baratheons
Tony Garry's Lannisters
Stuart Tomlinson's Starks
Chris Stone's Targaryens
Carlo Connor-Hill's Targaryens
Alan Liddle's Starks
Dan McDonalds Starks Best Painted Winner
Ross Joyce's Baratheons
Dean Rothwell's Targaryens
Ryan Odlin's Greyjoys with the "wet look"
GAME 6: Dark Wings, Dark Words, Ed McDonald, Targaryens
Ed didn't want a picture, he's a proper old school wargamer (and oddly enough friends with a chap from Southport whom I played at Justplay a few weeks earlier. Small world of wargamers...
Targaryen - Mother of Dragons (3 NCU)
Combat Units
• Unsullied Pikemen (7)
Daenerys Targaryen - Mother of Dragons (COMMANDER)
• Drogon (7)
• Rhaegal (7)
• Viserion (7)
Non Combat Units
• Illyrio Mopatis (4)
• Xaro Xhoan Daxos (4)
• Tycho Nestoris (4)
Well these were the cards for the scenario, but they're academic as they never got used...
The small but deadly army of Dragons...
The board was set up as below, with a pair of bogs which wouldn't be involved. A palisade on the right and hedge in middle left made up the four pieces I set up Reavers left off pic, Nute's Reavers, Bowmen, Reavers, Blacktyde Chosen and Reavers...
TURN 1
The dragons swung over to be near mother, while I kept it tight centrally, trying to block and position as best I could...
I was tempted to go in with assault orders here...
And was sitting back with it..
But I saved it for a flanking Nute charge on Viserion, with The Krakens Wrath too...
A few auto wounds from precision was nice...
And I was activating first in Turn 2...
4 wound sswas the result by the way!!!
TURN 2
I was expecting Tycho to be used but caused only two more wounds off the swords, due to Fire Made Flesh. Ed was being efficient with his card use. He used Tycho on the six wounds, and then sent Drogon in against the other Reavers that were threatening Viserion
A Crown attack with Xaros and his influence card against you know who...
saw me do you know what!!!
I didnt like this card on me versus Drogon... Nice!!!
Viserion bit back after Nute activated off the bags to add a few more wounds as well as activating for another...
A failed charge by the Blacktyde allowed Rheagal to move over...
and charging Nute's flank...
Rhaegal then repositioned to block arrows into Viserions flank, but the Reavers fighting Drogon went 100%, allowing the bowmen to shift over to get the flank shot. I destroyed the palisade on my right, as the unsullied and Daenerys scored of teh objectvie, while my left Reavers took the left. Viserion held the centre.
END OF TURN 2
HOUSE TARGARYEN 4 VP's (3 objectives, 1 unit)
GREYJOY 1 VP (1 objective)
TURN 3
Viserion was shot and killed by the Ironborn Bowmen. He had had Nute and his Reavers chop away with 4 attacks, and took volley in the flank twice to drop him!!!
Ed was good enough to pose him for effect!!!
Drogon meanwhile was hungry
And both he and Rhaegal were closing in on their brothers killers!!! Well, I actually charged in with the bowmen to try and pin the beast...
However, whenthe Blacktyde took horses to position a charge on Rhaegal, so the dragon withdrew from melee of the bowmen. My right Reavers would sooner chase a Dragon than charge the front of the Unsullied Pikemen
END OF TURN 3
HOUSE TARGARYEN 8 VP's
HOUSE GREYJOY 5 VP's
The Bowmen died from a Drogon flank charge but I did manage a Rush of Aggression into him, for a few wounds... Viserion then flanked my Reavers...
It was always going to be a tough ask to bring more than one beast down...
But I had to try and slammed into the rear of Rhaegal with Victarion and the Blacktyde Chosen...
I managed an impressive seven wounds, one short of slaying the beast and surging back onto the objective...
END OF GAME
HOUSE TARGARYEN 11 VP's (8 objectives, 3 units)
HOUSE GREYJOY 5 VP's ( 4 objectives, 1 unit)
Centre of board at end of game. Ed played the Dragons well, and had me dancing to his tune throughout. Mother of Dragons is a tough army to beat, and I have not had much practice against them. Still, the remaining two had a few wounds, and I'd only lost half my force. A good learning experience, and weird that neither of us scored of the cards.
So did Asha outfight Victarion to make good her escape???
Day One saw Asha score 27 VPs and 38pts of enemy units destroyed.
Day Two saw Victarion score 25 VP's and 28pts of enemy units destroyed
A narrow escape, but and escape none the less. Asha will return to the Iron Islands on her own terms!!!
Faction masters:
Lannisters - Ben Duggan
Starks - Stephen Connor
Free Folk - Mickey Arnold
Targaryens - Dean Rothwell
Greyjoys - Aaron Taylor
Neutrals - Adam Harbinson
Mid-Table Master - Alan Bainbridge
Winner - Tom Bell
A fantastic event, really really great, well run and well organised, good lunches (always important for me) but what mad it truly special were the players. So many people I spoke to and didn't even get their names, plenty of usual crowd and just a brilliant, sociable weekend. Cannot wait for next year!!!
Have to say one final well done to Ste, from the Wardens of the North-West who travelled up with me from Liverpool for being on the top table for the final game, eventually placing fifth but top Stark player...
Ste with John Craig who ran the magnificent event.