Friday 31 January 2020

Conquest: 1500pts Spire v 100 Kingdoms


The Spire v The 100 Kingdoms

So after last week's inaugural battle, my 100 Kingdoms force faced off against Andy and his dreaded Spire. Difficult to assign any "fantasy" description to The Spire faction, but essentially their troops are made and consists largely of drones and clones. Think Ants and Hive mind and you're not far off...

Like all the Conquest models, they are very nice and like me, Andy has three starter boxes worth of his force.

SPIRE FORCE:

High Clone Executor (Warlord) with 12 Marksman Clones (Medium)
Mimetic Assassin with 24 Force Grown Clones (Light)
Pheromancer with 12 Force Grown Clones (Light)
12 Force Grown Clones with Catabolic Node (Light)
12 Force Grown Clones with Catabolic Node (Light)
3 Brute Drones (Medium)
Abomination (Heavy)
Abomination (Heavy)

This gave Andy a whopping 13 activation cards


In comparison, I fielded 7 units, with two characters but I had beefed up my forces from last outing

The 100 Kingdoms force:

Noble Lord (Mtd Warlord) with 5 Households Knights (Medium)
Imperial Officer with 20 Men-at-Arms
24 Men-at-Arms with leader
12 Mercenary Crossbows


Not my most flattering picture...


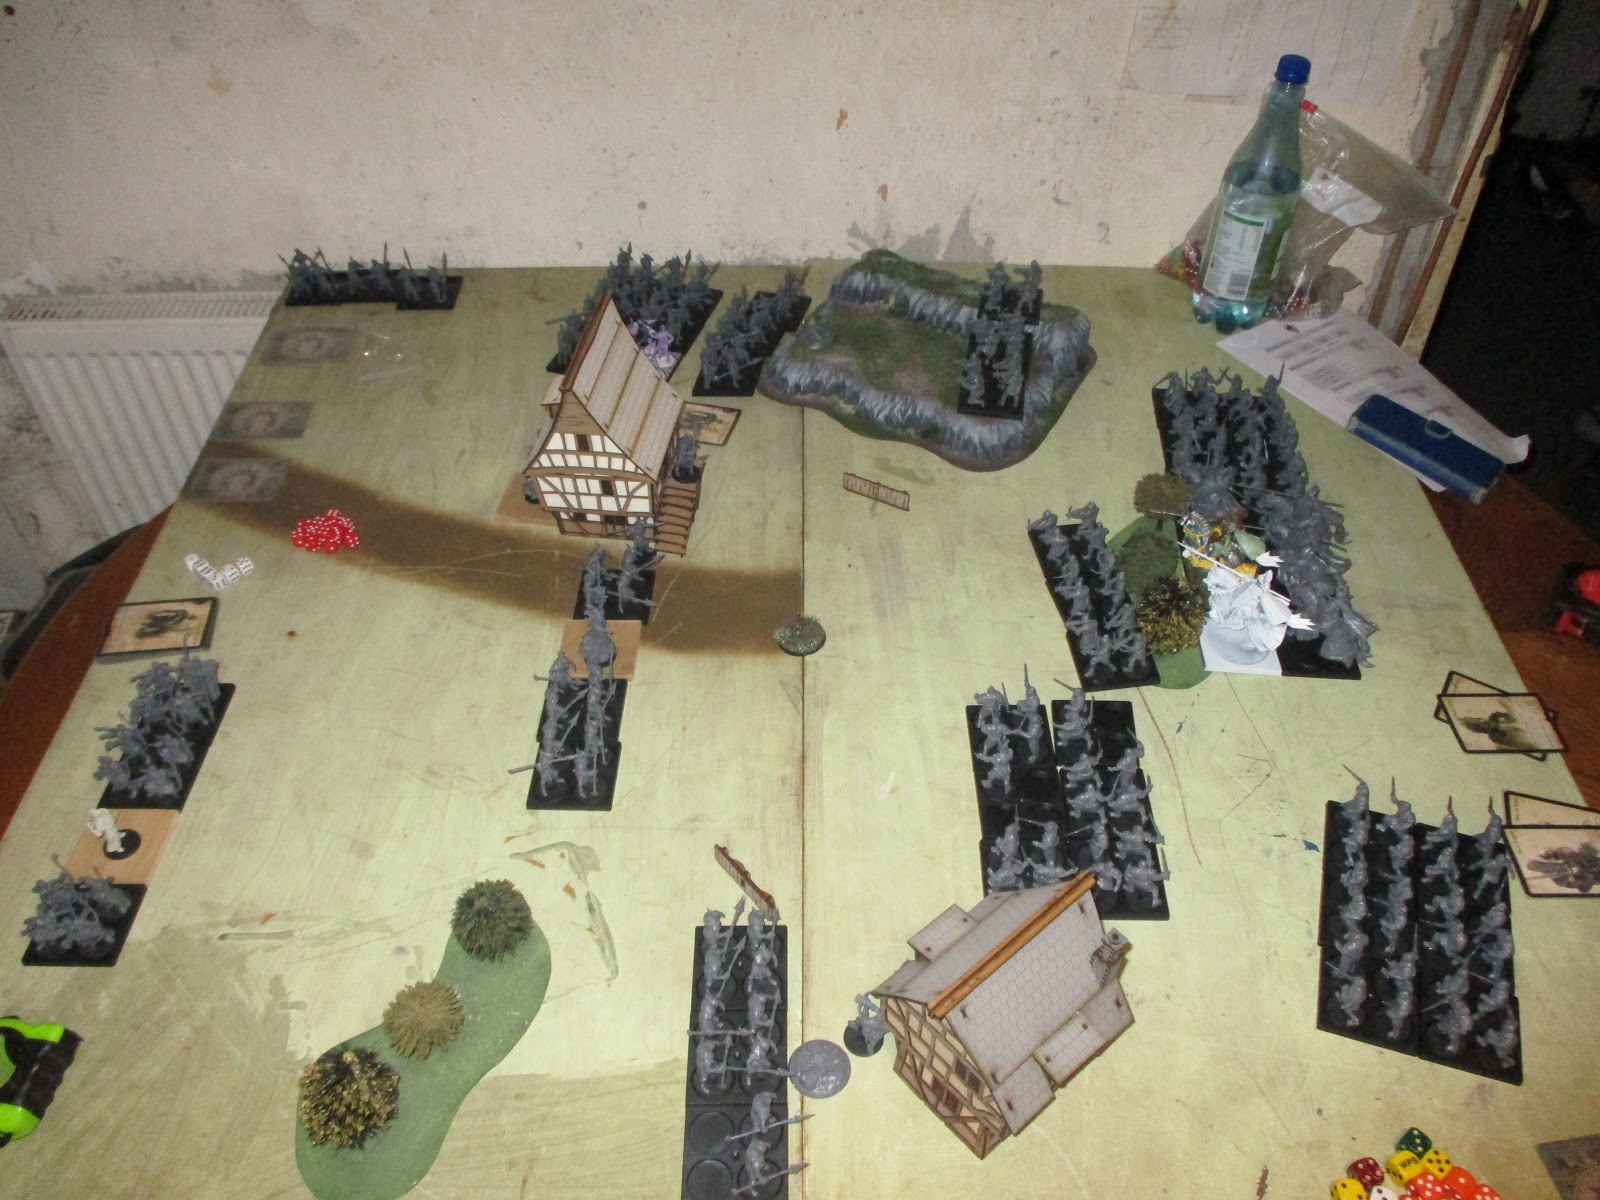
We played a simple straightforward mission again, with control of central objective giving 2 points, 1 for each flank objective. The buildings are an excellent fit for the larger models, from the 4grounnd Mordanburg range https://www.4groundpublishing.co.uk/fabledrealms/mordanburg  and were garrison terrain limit 12, with a hill and two woods.


TURN 1

We rolled for our light units, with Andy holding off his large unit with the assassin. I got all 3 Crossbowmen on, while Andy got 3 of his force-grown clones and we marched up as below.
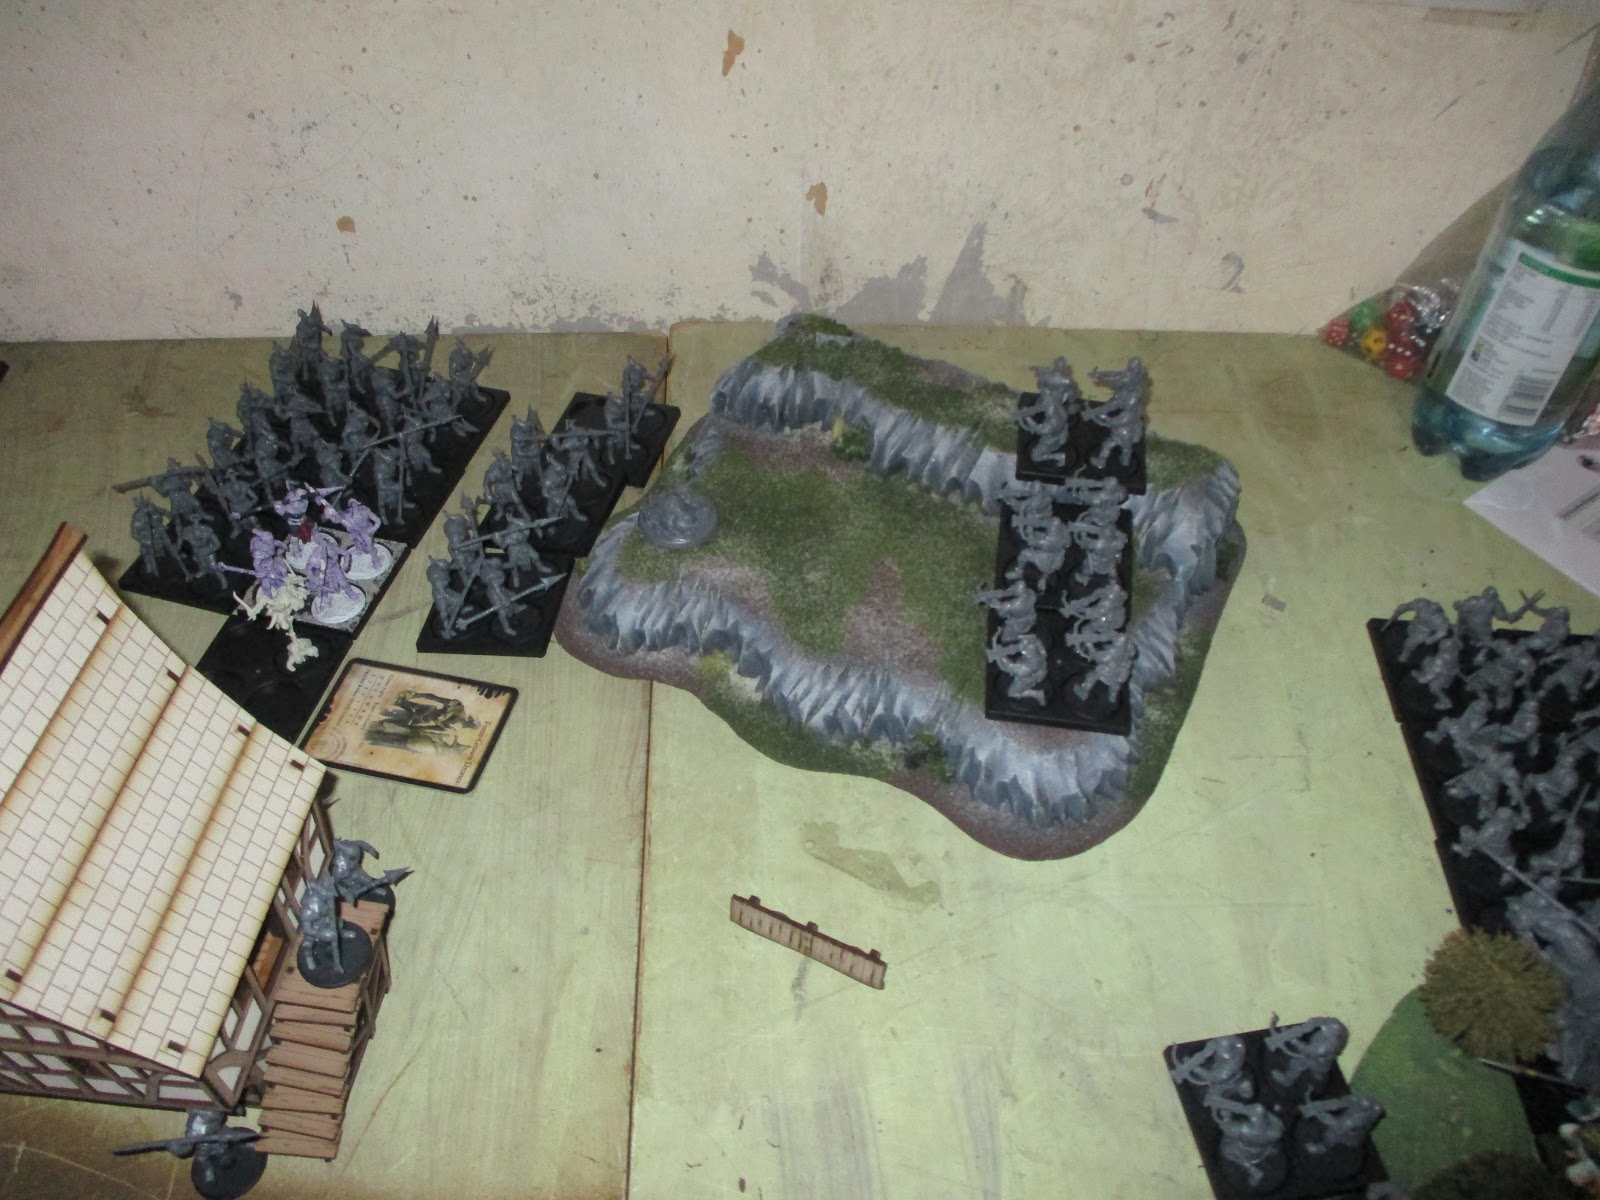

TURN 2

Andy got his 4th light unit on (still keeping his assassin off) while I got one of my 4 mediums on, electing to have my Imperial Officer on board. One of the force-drone clone units took the larger house, while my Crossbows secured the smaller, and I took the hill...


TURN 3

I had my whole force arrive, while Andy finally brought on the Assassin with his large clone unit. Turn 3 saw a lot of crossbows strike down clones centrally but the Pheromancers worked overtime to heal up the slain...


However, on my right flank, the highlight of the game for the 100 Kingdoms was the 12 shots requiring 3 or less, and lucky me scoring 10. Andrew then failed all his saves, and his whole unit was wiped out, scoring the first point as I had the Wind of Death secondary objective card...

"10 Little Spire Clones, just below the hill,
 12 aiming crossbowmen, with their iron will,

10 silly Spire clones, want to climb the hill, 
Never gonna happen, they're all now lying still..."

It has to be said, I do get some lucky dice at times. Whereas on my left, the other small unled clones failed to charge home against the garrisoned house...


TURN 4

Andy managed to get the Brutes on automatically, and both Abominations. Having got the first activation, and feeling Andy would look to heal again from the inevitable crossbow volleys, I managed to outplay him. I charged home after advancing up my Imperial Officer and Men at Arms. (This meant I would forego attacking, but had gotten into melee and stymied Andys plans.) My logic was to bust through his skirmishers and free up the field for my Knights next turn...


Sure enough, with his orders mixed up my crossbowmen decimated his right Clones who then charged home triggering their node which only killed two crossbowmen while leaving two clones. On my right, the Mimetic assassin repeated my Imperial officer and led a charge into the crossbowmen, foregoing melee to close...


At this point, the field was clearly controlled by the Kingdom of men. However, the cunning Spire had not put out its full might...


The beasts arrived, both on my left (Andy's right) where two clones were all that was there...


With the High Executor and his multi-limbed Marksmen advancing up to close range and make their volleys more effectual, and the brutes moving up behind the large house, I realised with horror the trap my men had been lured into...


TURN 5

The score was now 1 to the Spire (card objective), 3 to the Kingdom of Men (controlled centre, 1 card)

Andy got first activation, and his Warlord triggered his supremacy trait with devastating results. One abomination charged my left Men at Arms.


And butchered them!!!


The second Abomination flanked my Imperial officers Men-at-Arms...


And butchered them twice as badly, wiping out the whole unit in a flurry of massive claws...


And as my Warlord's dreams of glory was being torn limb from limb in front of him, the Brutes flanked his cavalry at the run, neglecting melee but pinning them in place, where they would be subjected to repeated volleys from the Marksmen Clones...


Still, my crossbowmen still held the small house and finished off the clones there...


My Warlord was in a pretty pickle, but successfully reformed in melee to lash out at the Brutes...


Well, I was leaving an Abomination in my rear and several Clone units in my flank, but I had ridden into the trap and had to try and fight my way out of it...


The Crossbowmen on the hill, died quickly, between multiple spears and an Asssassins blades...


Barely one turn ago, the field looked totally different...


The scores had closed 2 to Spire, 3 to 100 Kingdom...

TURN 6

With first activation, I charged into the large clone unit on the hill...


While the second Node detonated, killing two of my knights...


The Abomination was valiantly attacked by my Men-at-Arms, who took half its wounds...


before the enraged beast trampled them underfoot and claw and proceeded to engage the crossbowmen...


Clone Marksmen at close range decimated my Knights, but the Noble Lord hung in there...


The Clones sit at the rear, with the High Executor directing fire into the armoured horsemen...


While the second Abomination smelled the Crossbowmen behind him and went hunting for them...


With light units unable to claim objectives, turn 6 ended with the 100 Kingdoms still 3-2 up. But the tide of battle had decisively turned for the Spire...

TURN 7

The Crossbowmen amazingly took a few wounds from the Abomination, but were slaughtered in return...


It's twin reduced the garrisoned crossbowmen down to a single mercenary, who knew he was doomed but stayed to await his fate, bloodied and broken and unfit to contest the objective...


The Men-at-Arms fought on, bringing more clones down...


While the Warlord's nobility left him (along with his bodily fluids) as he fled in ignominy from a small force of Clones, that finished off his bodyguard (scoring a card objective for the Spire)


And the Mimetic Assassin singlehandedly cut the Men-at-Arms to pieces...


The sole Brute advanced to score off the centre objective...


The game was all but over now, with the Spire leading 6 to 3...

TURN 8

5 humans against an entire army...


The mimetic assassin took a man-at-arms down with each sword swing...


While the last man standing saw his dagger bounce off...


And was torn from the buildings in a frenzied orgy of violence...


The game ended with a mighty Spire victory, 9 points to 3

The forces (well, force) left at the end of the battle...


The battle seemed to start very well for my forces but I could not get through in time before the Abominations slaughtered my entire left flank. The rain of arrows from the Marksmen was devastating when they'd closed up, and the supremacy ability allowed the Spire to cave me in before I could strike back. All in, a very bad day to be a human as the Spire dominated...

Thursday 23 January 2020

Conquest: Last Arguments of King

As former disgruntled fantasy Battle Players from a good system (when it exploded into a mad world of cosmic bubbles) Chris, Andy and I have spend a long time aaiting in the Fantasy wilderness. Fortunately, Para Bellum's Conquest: The Last Argument of Kings has arrived to get us playing in another fantastic fantasy world...

As a 35mm fantasy game, it's got great models, great setting (fluff) and excellent tactical gameplay...

The world, its setting, the game, gallery, factions breakdown and more detailed imagery of the models can all be found here...

https://www.para-bellum.com/conquest/

Chris, Andy and I each bought the Core box set, which is exceptional value given the contents. Chris wants the Nords, but they're only just coming out so Andy and I ended up with the to factions in the starter set (I have the 100 Kingdoms, Andy has the Spire).

The Core set and contents...


We had a few games last year when we first got it, but are looking to go full throttle this year with the game. So we took our figures up to the Ribble Warriors in Preston
 https://www.facebook.com/groups/9961874990/


We settled on 1000pt forces, with my 100 Kingdom having two warbands consisting of a Noble Lord with 4 Household cavalry, and two groups of 3 stands of Men at Arms...


My second grouping consisted of 5 Men at Arms stands led by my Warlord, an Imperial Officer (using a stand in from the Steel Legion leader) and 2 units of 3 groups of Crossbowmen.


The Steel Legion Officer and Standard bearer (or my commander, an Imperial Officer)


My Noble Lord with his Household cavalry...


As I said earlier, Chris is planning on the Nords faction (think Viking, with trolls and giants). But he couldnt wait so invested in the Dweghom (think Dwarves).

Chris had a Hold Raegh as warlord, in with 5 stands of Hold Warriors, with an additional unit of 6 stands of Hold Warriors. In support he had a Tempered Sorcerer (fireball throwing mage) and two units of 3 Hold Ballistae. All his units had leaders and standards.


 We set the board up fairly open, with a blocking hill and some woods. You assign terrain specific rules as agreed with your opponent.


The scenario we played to re-jog our rules memory was straight forward, with points scored for holidng the battlefield (2 points after turn 3 for central objective, 1 point for each of the two flank ones). The game would last for 10 turns, but was more about re-establishing the rules.

One of the most interesting deviations from the "norms" of other games is the unit classifications as Light, Medium and Heavy and that no units start on the board. On turn 1, both sides roll a dice for their Light units, and can advance them on with a 3+ roll. No other units can come in (think scouts).

In Turn 2, Lights auto come on, and Mediums are on a 5+. Turn 2, Mediums 3+ and Heavies 5+, and so on with everything auto on by turn 5. Also, your follow on units can start deploying where the rear of the advance are, so they are not traipsing on from the board edge. This allows a good scouting force to gain an advantage.


 By turn 2 my Light units of Crossbows had advanced up the flanks while the corresponding Dweghom Hold Ballistae massed on the hill and centre. My Imperial Officer led his Men at Arms up towards the central objective...


The combinations of two units of Dweghom crossbows had decimated my left flank crossbowmen. All units activate by using their unit cards, which you organise in the order you want them to activate. Needless to say, this gets very tactical as there are more units on the board/ Units can make 2 activations, but the only activation they can do twice is move (essentially march). They can move, fire, fight, charge (move +D6) and also inspire. Inspire allows plus 1 to hit in melee, aim is the same for shooting.


In Turn 3 the Dweghom still only have their two lights on at the start while I had 3 units. I also got all my medium units on, as did the Dweghom. My first activation was to bring on a 3 stand Men at Arms group and advance them through my right crossbows...


As the sequences progressed, I had advanced my right crossbowmen up only to find a horde of Hold Warriors stream up and out of the woods...


My cavalry led by Noble Lord deployed and sped up the centre, while my Officer led the Men at Arms up to the centre objective (worth noting the Men at Arms and all the Dweghom troops come with shields which we've left off to allow ease of painting)


Having made my charge next turn obvious (as you charge in a straight line), the Hold Raegh led his Warriors on from the flank to allow them to flank my charging cavalry if I carried it out...


You can see the trap the Dweghom had set...


Still, my Noble Lord could not really resist lancing that Tempered Sorcerer, could he???


On my right flank, the crossbowmen fired a volley at the Dweghom doing a bit of damage...


My Household cavalry and Noble Lord charged into the Dweghom Sorcerer and his Hold Ballistae


 The Dweghom were badly mauled but they stayed resolute and held the charge in place...


The Hold Warriors smashed into the Crossbows, but Chris's dice rolls were simply awful and only lost a third of their number...


The Dweghom Raegh and his troops negated some of my defence due to hitting my flank, and my cavalry force was smashed...


My Men at Arms had to reform before charging, which meant they could not attack this turn, but aided the crossbowmen nonetheless...


The 100 Kingdoms forces still held the objectives in the centre and right and had racked up enough points to win the game (as you also draw three objective mission cards and I had achieved 2/3 while Chris hadnt scored any).


 But by this point we'd neglected the points as we revisited the rules and concentrated on smashing each other. It's sometimes the best way to learn the basics!!!

My Lord and Knight finished of the Tempered Sorcerer by killing the unit (the Hero goes down with his men, or Dwegs in this case). However, as well as the unit cards being placed for activations, so too does your characters as when they are drawn they can do their own activations (they also act with their accompanying units). So the Sorcerer can throw Fireballs, for example, while more fighty characters can issue challenges!

The Dweghom Hold Raegh's duly did and my Noble Lord accepted... The big axe should have given me a clue!!!


The Dweghom Warlord chewed through armour, flesh and bones, where as I couldn't scratch him (duels are generally simultaneously, though items/skills can give advantages)


However, on the rights my Men at Arms were inspired and cut through the Hold Warriors, partly due to really poor resolve (panic/morale rolls)


In the centre, my Imperial Officer and his troops cut through the light Hold Balistae unit...


while the lone Knight clung on in desperation, holding the Dweghom advance...


Having slunk around at the rear, my second small Men at Arms unit advance up to support


The Dweghom finish of the Knights...


But the Hold Warriors on the right prove resolute, surviving multiple attacks over several turns. My Men at arms charge the Hold Raegh's unit, doing some damage...


which ony serves to infuriate the Raegh and his boys, who literally tear the Men at Arms apart...

As the Imperial officer's unit squares up to the opposing Warlord troops, the two Dweghom on the right still hold on


Combat ensues as the Dweghom charge in...


The result of the duel was kind of expected (as my Imperial Officer isn't as good a fighter as the mounted Noble Lord and he went down like a sack of spuds!!!)


The game was over long ago in "technical" terms with the 100 Kingdoms winning handsomely on points, but the moral victory certainly went to the Dweghom Hold Raegh who annihilated everything he and his unit of Hold Warriors touched...


We really do love this game, the fluff and setting is great, the figures awesome (the Nords and character figures are truly exquisite). We'll be demoing the game at shows in the UK later in the year at ones we can attend, and it will be our main game for this year. There is just some much depth to it, which I'll explore further in future reports...

A few examples of the figures I mentioned

100 Kingdoms: Noble Lord on Foot


 The Spire: Clone Executor
 Nords: Jarl
 100 Kingdoms: Chapter Mage
 Dweghom: Hold Raegh
 Nords: Raiders
 Nords: Mountain Jotnar