We'd decided to play Fire and Blood, as it very much an "in your face" scenario and normally a quick and brutal affair.
My Lannisters were as follows:
NCU's:
The High Sparrow (C), Tyrion Lannister
Combat Units:
2 x Lannister Halberdiers
2 x House Clegane Mountains Men
2 x Poor Fellows with Champions of the Faith
Raymond opted for a very elite and smaller force for his Stannis led Baratheons, with 4 points of attachments. It was as below:
NCU's:
Shyra Errol, Walder Frey
Combat Units:
House Bolton Flayed Men
Stag Knights with Stannis Baratheon (C)
Baratheon Sentinels led by Brienne of Tarth
Baratheon Wardens led by Bronn
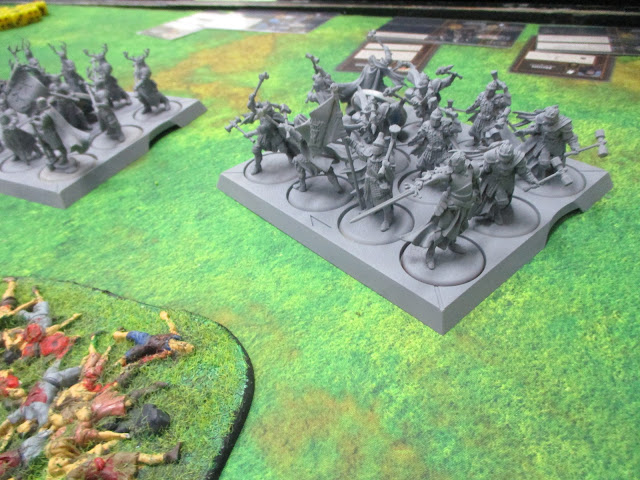
Stannis and his Stag Knights and Brienne with her Sentinels on the left
The new Brienne sculpt is my favourite attachment model to date. Love the way she is challenging her victims...
Not very often the Lannisters have such numerical superiority...
In the Fire and Blood scenario, you can set up 18" on the table and mark two units of your opponents force as priority targets that give bonus VP's when destroyed. Raymond targeted two units on my left, the Poor Fellows and the Halbderdiers, who were also targeted by Brienne (her unit gets additional attacks against it and a to hit bonus)
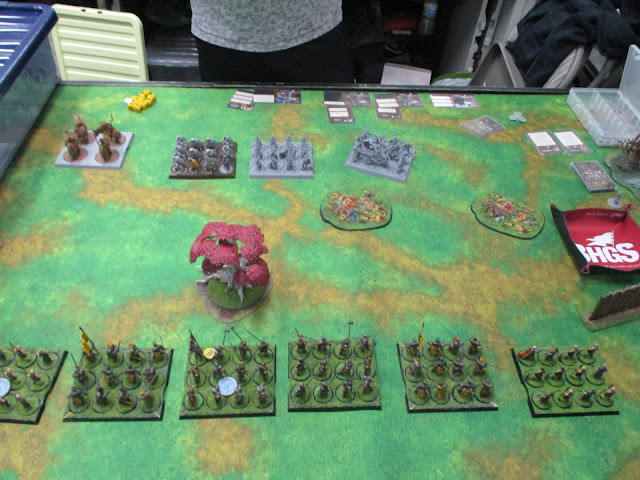
I liked the look of the Lannister horde. The terrain is a centre left Weirwood tree, 2 corpse piles and a palisade to restrict board manoeuvrability.
Raymond deployed centrally with Stannis and the Stags centre of his infantry, with Brienne on the right as you look and Bronn on the left, where his Flayed Men were on my Left as well.
I had already countered by tagging the two target units I'd marked on my right, Stannis and Brienne's units (as had the lowest armour).
My set up was uniform, with two central halberdier units, with their Mountains Men on their flanks and a unit of Poor Fellows on each far end...
Definitely some heavy metal on the Baratheon right...
Still, that gave me two units advantage over on my right...
TURN 1
I'd already placed Tyrion on the letters and boosted my card hand to 6 cards, and then the units manoeuvred before the only real play of note with Walder crowning one unit of Halberdiers while influencing and wounding the other...
I'd advanced slightly to entice the Baratheons in...
But the Baratheons weren't easily baited, and we both were cagey on my left and Raymonds right...
So I swung my right hook up and at 'em ready for turn 2 and to give the Usurpers some thing to think about...
TURN 2
With the Baratheons on first activation, Brienne's Sentinels reacted and moved left with Walder on the free manoeuvre and again targeting my Halberdiers. I healed up my Halberdiers, with the High Sparrow, influencing my Halberdiers, then Shyra took the letters...
Then the bloody work began, as I launched into Brienne's Sentinels, taking a 50% frontage to allow the Mountains Men to help, doing real damage with lucky dice and having passed a morale check to get the faith token. However, having weakened myself, the Sentinels response cut through the peasants leaving them barely hanging in there. The Sentinels also shifted to 100%, which with Stannis and His Stags Knights not committing blocked any assistance to the fight...
I placed Tyrion on the Crown and panicked the Sentinels...

True to form, Raymond and Brienne rolled well, rather poorly

TURN 3
With first activation, I took the opportunity to activate my right hand Free Fellows, reinforcing them and giving me 5 swings at Brienne and her two remaining Sentinels, which with the expending of the Faith token finished the unit off and allowing the Free Fellows to surge forth threatening Stannis's rear. Raymond then put Shyra on the letters, so I took the gift horse of charging the Poor Fellows into the Bolton Horse, expending faith and killing a whole rank with hits, auto wounds and a failed morale check by them. Aw well, being blinded by Faith is not always a good thing as an imminenet Baratheon card flurry was to prove as the Poor Fellows gift horse turned out to be more of a Trojan horse...
As the return strike from the Flayed Men and a failed panic check on my Poor Fellows saw them wiped out, I charged into the Wardens with my critical blow Mountains Men, who rarely let you down...
Rarely, but when they do, they do!!!Following the weakened re-roll, I had hit 3 times and they were all saved, allowing a Baratheon counter charge...
In came the Flayed Men on the flank, and the result wasn't a total disaster...
But the sole standard bearer then got wiped out allowing the Wardens to surge forth backwards to protect Stannis from being wholly enveloped!!! My whole left flank had shattered. Turn 3 has started off so well...
Still, in the centre Raymond had stacked 3 cards on Stannis's unit of Stag Knights making them look very daunting. But I had my healed up Halberdiers and right Mountains Men lined up to charge, so I duly did. I went in with the Halberdiers first, wiping out a rank, and the response and bonuses back saw me lose half the unit (and that was only due to "Wealth of the Rock" helping out). But I figured I still had an NCU and the swords were free, so two swings with the Mountains Men should do it if they could charge in over the corpse pile...
Well, they did, and they didn't let me down. Critical blows galore and some really dire rolls saw the Stags Knights and Stannis totally obliterated on the charge!!!
The Mountains Men had regained my favour and surging forth gave me battlefield dominance and a two to one unit advantage. And my marked Halberdiers (now my left end unit) still hadn't activated, so I decided on a bit of a gamble to press my advantage...
The Sparrow took the manoeuvre and my Halberdiers charged at the depleted Flayed Men...
Well, it was a gamble that nearly worked, but I didn't manage to charge home...
End of TURN 3
Lannisters 6 VP's (two marked units destroyed), Baratheons 4 VP's (one marked and one standard unit destroyed)
TURN 4
Raymond surprised me by taking the horses first activation with Walder, but it was an astute move as it left my marked Halberdiers potentially out on their own for a turn. I duly played the part and took the bait again, savaging the Flayed Men without rerolls as I had rolled a 1 on the chare so it was disorderly. Raymond was well chuffed, as under V1.5 rules, you cannot play cards on a turn when you disorderly charge...The Boltons held at reduced strength abut I was then counter charged by the Wardens in the flank and could not counterplot it due to that rule, nor use wealth of the rock... As it was, the damage was negligible, and I managed to hit the Wardens hard in the flank with my other Halberdiers and due to some good rolling, poor saves and bad morale, as well as having Tyrion take the swords, I wiped the last of the Baratheon infantry out, surging forth to make turn 5 all but a done deal!!!
Although I should point out that the Flayed Men and their critical blow attacks managed 7 hits against my 7 marked halberdiers, but the quality of the Lannister armour (or my lucky dice more like) saved all the hits.
End of turn 4, Lannisters 7 VPs, Baratheons 4 VP's
TURN 5
With first activation, I used my marked Halberdiers in order to heal with Sparrow's Mother card and fiinish the job, but with typical stubborness, Raymond refused to fail a save and even struck back, unding all my healing...
But although valiant, it was futile as the second Halberdier unit hit home into the flank, finishing of Stannis Baratheon and his rebellion against the One True King!!!
End of TURN 5
Lannister 8 VP'S to Baratheon 4 VP's...
Raymond knew from start he might struggle with just 6 activations, wanted to try out new models and units, and they were tough units and I did get some incredibly lucky rolls when they mattered.
It was cagey for a game of Fire and Blood, as previous games I've been in melee turn 1. However the historic precedence of having your strongest and best units on the right wing of your army still holds true, with both our rights flanks caved in the enemy left, though with my numbers I was able to capitalise best as I swiftly outnumbered and out activated Stannis in his Stag Knights...
It was certainly a good first outing for the Poor Fellows, and we both learned a lot. There are some savage cards in the Baratheon deck, and the game was certainly closer than it looked as though I had more units left in turns 4 and 5, the two that were closest would both have given up 3 VPs to potentially tie the game or cost me it. But for now, the Lannisters march North, as I'm up at my first tournament of 2020 at Gamingfigures https://www.gamingfigures.com/ for their event on 12th January.
I was planning on taking Joffrey and his Kingsguard as I have not used them for a while and they are fun. However, I think the High Sparrow and his minions should be rewarded for a good first outing, so the list I'll be using is slightly tweaked from the above.
NCU's The High Sparrow (C), Tyrion Lannister
Combat Units:
2 x Poor Fellows
2 x Lannister Halberdiers
1 x Mountains Men
1 x Knights of Casterly Rock
Still 8 activations, but miss my cavalry and after the Mountains Men let me down, felt losing them and both champions of faith is a good trade...
Coming soon!!! 4 game tournament report


Very solid battle report! Nicely done! :-)
ReplyDelete