So following my rather impressive performance at the Yecats Miniatures East Anglian GT with the Young Wolf (spoiler: I was the Best in Faction for Stark, at my first event running them), Ste "PsychoSte" Connor was anxious to put my double Tully Sworn Shields to the test with his double Tully Cavalier Eddard list.
XXXXXXXXXXXXXXXXXXXXXXXXXXXXX
WARDENS OF THE NORTH-WEST MEDIA CONTENT
(Courtesy of Aden "spykr")
YOUTUBE @WotNW
TWITCH wotnw
XXXXXXXXXXXXXXXXXXXXXXXXXXXXX
With four other Wardens of the North-West playing, we gathered down at Justplay in Liverpool for a bit of a get together.
"Old Eddard Ste"
Ste was running his tried and tested Eddard list, and I knew this would be a very tough match. But I did choose Game of Thrones for the Scenario, as it's my strongest scenario.
Eddard's Honor Guard with Eddard Stark (C)
House Tully Cavaliers with Winterfell Guardian
House Tully Cavaliers with Winterfell Guardian
House Umber Greataxes with Robb Stark
Grey Wind
NCU's
Sansa Stark with Lyanna Mormont
My own Robb list was really forged and tempered in battle at Thurrock
but I knew Ste would be using Sansa for Winter is Coming to turn of my
cards and Shield wall, so was expecting the worst.
House Tully Sworn Shields with Robb Stark (C)
House Tully Sworn Shields with Rickon & Osha
Stark Bowmen with Crannogman Warden
House Umber Berserkers with Greatjon Umber
Shaggydog
Grey Wind
NCU's
Catelyn Stark & Eddard Stark
We are both going to Always Winter Aug 23rd/24th in Stirling, but hoping Ste wont run Starks there
RANDOM TERRAIN & DEPLOYMENT
Terrain: Stakes, Wall, Stakes and Stakes
Ste's Starks: Tully Cavaliers, Tully Cavaliers, Eddard's Honour Guard,
Greywind behind, Greataxes
The Good Starks: Shaggydog, Rickons Tully Sworn Swords, Robb's Sworn Shields,
Bowmen, Berserkers, Greywind
Andy and Barry were playing A Dance with Dragons, Andy using a triple Lannister Red Cloak list v Barry's Baratheons
While Colin and Greg were playing Fire and Blood, with a triple shooting unit Martells facing Mag and his Monsters
ROUND 1
Ste took the Letters, weakening the Bowmen. I took the Horses and moved up my Bowmen.
Ste blocked the Swords, I took bags and removed weaken. Ste used a pass token as we sought to get a feel of how our opponents would play. After both cavalry had activated, Robb Marched up onto the centre, with wall central for added defence. Ste then marched Eddard up, triggering my Overwatch. As I told Ste I was using the order, he changed his mind but Colin called him out much to my amusement (as I wasnt really bothered, for all our smack talk, we both play pretty chilled) but as Greg joined in ripping on Ste, Ste let it stand, but saved all the hits anyway.
.
BOARD END OF ROUND 1
Bad Greywind moved to my far left, I pulled both Wolves together after Good Greywind killed stakes in front of the Berserkers. The Cavaliers closed in menacing as I had Rickon move up to support Robb's flank
ROUND 2
I weakened the left Tully Cavaliers with Catelyn and drew two additional cards.
Ste had Lyanna Mormont takes the Swords and played Assault Orders
Charging his mid Cavaliers into Rickons unit
Ste played Winter is Coming followed by Northern Ferocity for his eight attack dice
I took a few wounds as my armour held well but healed up off of the bags. I felt pretty happy with that.
Looking for a diversion from the imminent pain coming to my left, I went for a 4+ charge into the Greataxes with the Berserkers. I sadly rolled a three...
To my right, Varamyr had been Precisioned to death by the Martells so Greg sent his Mammoth in for payback
The Red Cloaks panic checked a lot of Baratheons
Back in the Tully battle, Steve activated his weakened unit of Cavaliers after using Sansa to draw back Winter is Coming (as predicted by Psychic Brian). But my hopes and dreams came true when he rolled a 1 for the charge...
With a weakened token, and no re-rolls, Ste got three hits and I saved two. He then took two wounds from the Counterstrike Osha provides... Oh, how I laughed. Sorry Ste!!!
I then activated Rickons Tully Sworn Shields, and attacked the flanking unit of Cavaliers, playing Winters Might for Sundering...
I caused two wounds, before Ste failed his panic check for two more. Again, I apologise for my severe piss taking
So to recap, a flank charge with Cavaliers and an attack back by Sworn Shields was currently showing 7-1 in my favour. Ste then activated Eddard's unit, who moved away from Robb to threaten my Bowmen
I then activated Shaggydog, making a 3+ charge and playing Devastating Impact giving a vulnerable and panicked token. This resulted in 3 failed saves...
And I didn't even have to use the panic as Ste blew it again!!! Can't beat bad dice, but that didn't stop a good five minutes of piss taking from the rest of the Warden (although offering Ste the opportunity to call it there was probably a bit harsh)
The other Tully Cavaliers retreated, having seen what I did to their comrades obviously unnerved them
Oh, and Ste did play Fury of the Fallen to allow Eddard's Critical Blow bashing Honour Guard to almost one shot the Bowmen. My Berserkers lost four to the Greataxes.
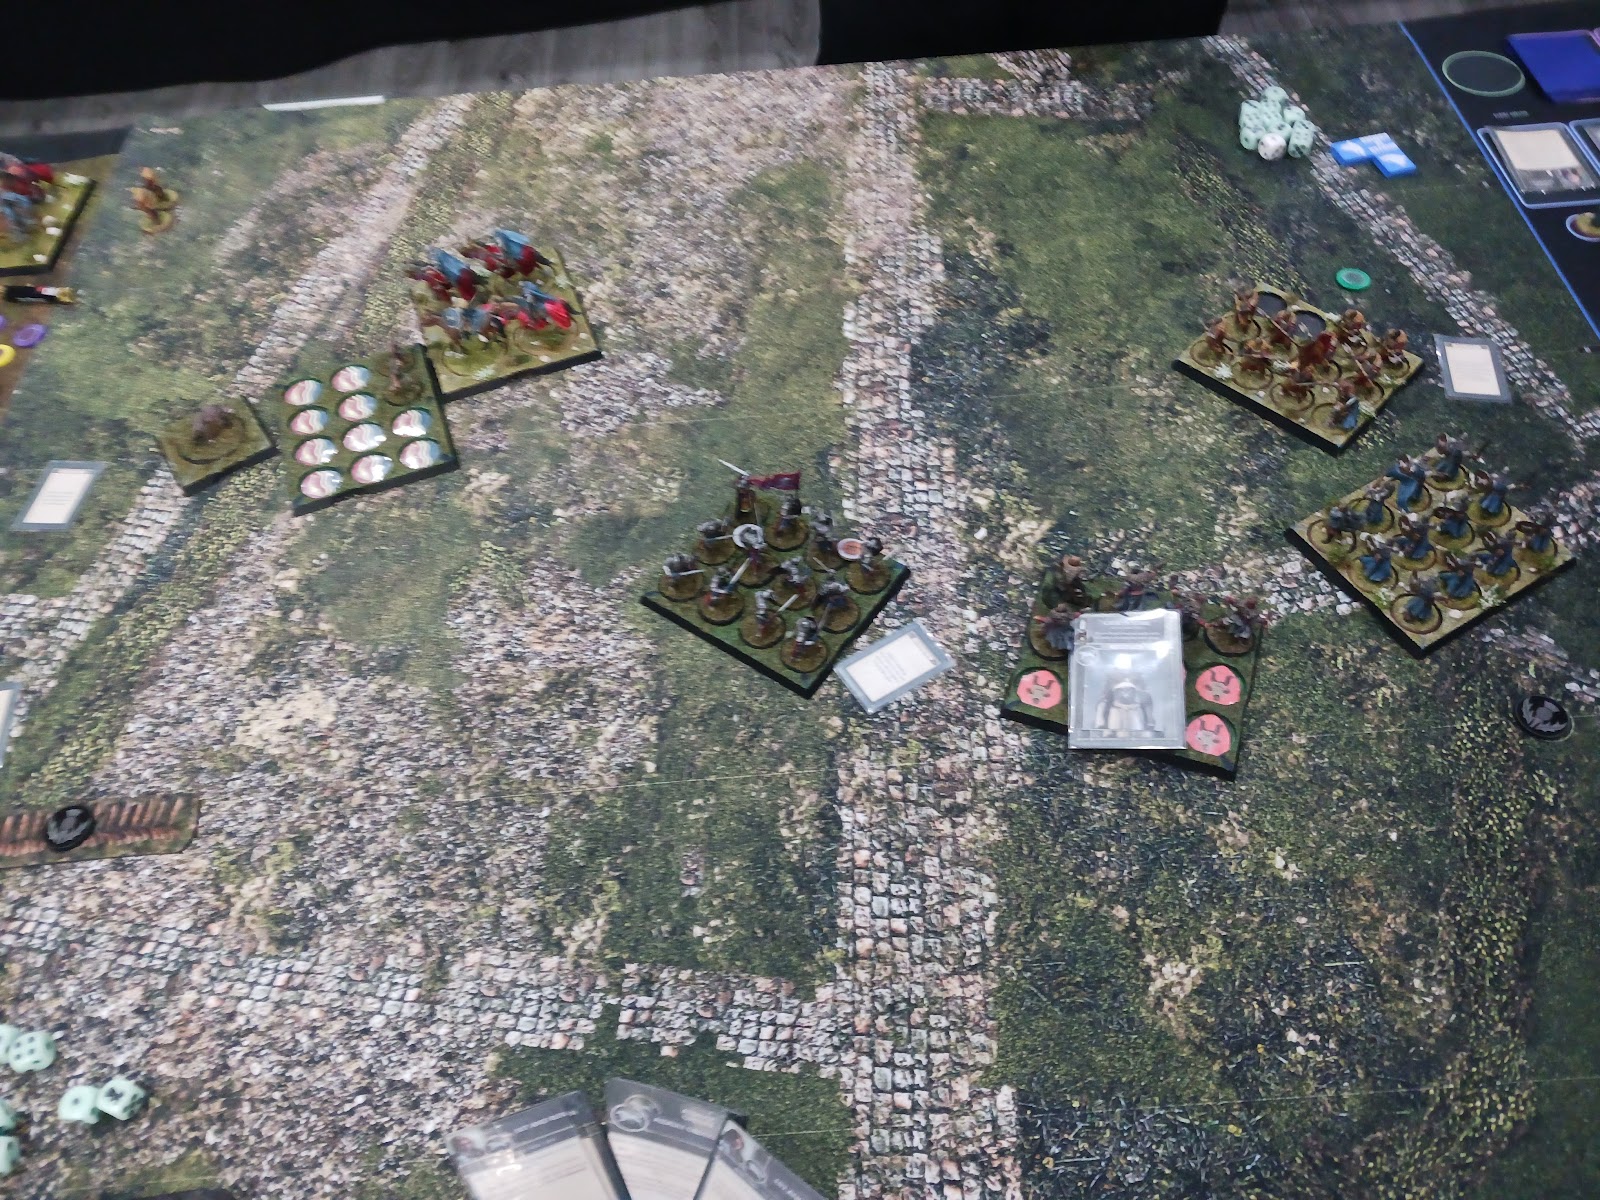
BOARD END OF ROUND 2
Ste had suffered a blow to be sure, but his Fury of the Fallen and infantry on the right had the upper hand and i would lose the Bowmen to the Swords as Ste had first activation. Ste had had some seriously bac luck, but game was still finely poised.
Tactics Board End of Round 2
END OF ROUND 2
ROBB STARK 3 VP's (1 unit, 2 objectives)
EDDARD STARK 1 VP (1 objective)
ROUND 3
Ste took the Swords and Eddard's Honour Guard cut down the Bowmen, backing up with their surge forth. I took the bags with Catelyn, who influenced and healed up the Berserkers.
Ste had certainly adapted well to his set back, rethinking his plan to smash my Sworn Shields. He took his time to formulate it mind...
So I attacked his Greataxes with my Berserkers, shifting over and out of charge arc of Eddard's Honour Guard
The Greataxes attacked back, and killed five but I passed my panic and healed up using Eddard. I then charged the Tully Cavaliers to lock them in combat with Rickon and Osha. Ste failed a 5+ charge at my Greywind
I played Assault orders when Eddard took the Horses
But having been weakened earlier from Ste taking the Letters, well, the dice gods are fickle and I fluffed it. This allowed Ste to play his second Fury of the Fallen for Eddard to charge in and easily kill my Greywind and seizing the right side objective. With his Tully Cavaliers retreating out again, I then had Shaggydog charge in to bad Greywind, doing a two wounds.
END OF ROUND 3
ROBB STARK: 5 VP's (1 unit, 4 objectives)
EDDARD STARK 4 VP's (2 units, 2 objectives)
ROUND 4
I took the Swords and had Shaggydog kill Greywind with my first activation. With the game being so close, I didn't take as many pictures as I should have but Eddard did activate and charge into the rear of the Berserkers, dropping them and forcing a To the Last check to survive. I had to use and Eddard token to pass the panic that followed, to save one To the Last. And I then played Sudden Retreat to get the Berserkers out of a nasty sandwich.
Meanwhile, to our left Barry's battered Baratheons were surrounded and about to die...Nasty Red Cloaks!!! To quote Barry..
"Never rolled so many morale tests in my life, never passed so many morale tests in my life but also never failed so many morale tests in my life"
So Ste had left the right objective but failed to kill Greatjon and his Berserkers who retreated away. The Tully Cavalier had gone after Rickon again, after Sansa fished out Winter is Coming, negating Shieldwall and cutting me down to Osha and Rickon. Shaggydog stayed put on the far left objective
END OF ROUND 4
ROBB STARK: 7 VP's (1 unit, 6 objectives)
EDDARD STARK 5 VP's (2 units, 3 objectives)
BOARD END OF ROUND 4
ROUND 5
Steve attacked off of the Swords at Rickon, but I saved both hits. I took the bags and healed the Tully Shields up (as I was out of Eddard token's by now). Steve took the Horses and retreated out. I sent Shaggydog in to engage the Tully Cavaliers, dropping one but taking a wound from the auto pass of panic thanks to Lyanna's influence. Ste then activated, doing three wounds and killing Shaggydog. I dropped Rickon back onto the far left objective.
Ste consolidated both his infantry units onto the right objectives. Robb and Greatjon faced them up
END OF ROUND 5
ROBB STARK: 9 VP's (1 unit, 8 objectives)
EDDARD STARK 8 VP's (3 units, 5 objectives)
BOARD END OF ROUND 5
ROUND 6
I had first activation, which with three units each and two NCU's, meant Ste would have the last.
I healed Rickon's Shields up off of the bags, Ste took the Letters, took the Swords to deny them to Ste. Ste swapped zone for Sansa to go fishing, I assumed for Winter is Coming...
Both infantry units in the centre and right activated and faced each other.
I charged the Cavaliers with Rickon and Osha, cutting them down a rank, but they passed their panic and healed up, doing a wound. I played Hit and Run and dropped back onto the objective, and would have to hope I could hold the charge
But Ste is a wily old dog, and had seen his dice fail before. Rather than risk the charge, he played the Swift reposition card he had drawn back, and moved his Cavaliers onto the near left objective...
BOARD END OF ROUND 6 (& GAME)
END OF ROUND 6 (& GAME)
ROBB STARK: 11 VP's (1 unit, 10 objectives)
(Points left on board 21)
EDDARD STARK 11 VP's (3 units, 8 objectives)
(Points left on board 24)
Always fun to play Ste, and this game was right up there with the best. I had expected Ste to run right over me with his Cavaliers but he had some really bad luck in turn 2. Don't get me wrong, I had already said to Andy pre game I'd have to rely on Ste rolling a 1 on a charge or two, but the two failed panics. Class!!! Ste then switched tactics to hit my weaker units, successfully targeting the Bowmen and Greywind. The Umbers exchanged blows, but neither really made an impact until Eddard arrived. The Honour Guard were Ste's MVP, taking out two units and nearly doing for the Greatjon. But played well too. Ste avoided Robb, who didn't get into the fight at all. When Ste allowed it, my card play was good and my Sworn Shields were solid.
So a draw was the result...
OR WAS IT???
"Old Jammy Git Eddard Ste immediately after the game"
Let's recap!!!
Only in typing up the battle report, did I realise that, having scored two objectives Turn 2 through to Turn 6.
10 VP's...
Plus I killed 2 units killed?
Yeah, I didn't give myself a VP for killing Greywind.
Ste must have distracted me...
End of Round 2: Centre and Near right
End of Round 3: Centre and Far right (as Berserkers had 3 ranks)
End of Round 4: Centre and far left
End of Turn 5: Centre and Far left
End of Turn 6: Centre and Far Left
"STEEEEEEE!!!!"
In truth, it makes me laugh and doesn't detract from the game, just adds even more spice than usual to our next encounter...
I think we will avoid playing each other until we go to
26th JULY,
BATTLEFIELD HOBBIES, DAVENTRY, UK
===============================================
16th AUGUST
The Hamworthy Club, Magna Road, Canford Magna, Bournemouth, Wimborne, UK
LINK TO STATS
----------------
Common Ground Games, Stirling, UK
AUGUST 23rd/24th
Got my ticket!!! Definitely one of the best events around...
7 tickets left...
And you can get Pineapple Tarts at Tescos 😍
______________________________________________
23rd/24th AUGUST
UK MIDLANDS GT
--------------------------------------------------
THE KRAKENS WRATH
28 Player, 3 game one day event
13th September 2025
Battlefield Hobbies, Daventry
_________________________________
YECATS MINIATURES PRESENT
UK NATIONAL CHAMPIONSHIPS

(formerly known as the LONDON GRAND TOURNAMENT)
Sat 27th / Sunday 28th September
Lea Valley Athletic Centre
61 Meridian Way, London N9 0AR, UK
50/70 tickets sold to date.
ASOIAF Stats Page
TICKETS
This will be an awesome event, don't miss it
Nine Wardens of the North-West will be present...
----------------------------------------------------
Board In Brum West Midlands Gaming Centre, Walsall, Willenhall, UK
Sat Oct 18
_______________________________
Thomas Whitworth presents:
A team event with more prizes than you could shake a sausage at...
SUNDAY 19th OCTOBER
LEODIS GAMES, LEEDS
------------------------------------
RIBBLE RUMBLE
"Never Forget What You Are"
SOLD OUT
NOVEMBER 29th/30th
ELEMENT GAMES, STOCKPORT
More info/tickets
"Never Forget What You Are" A Song of Ice & Fire at Ribble Rumble 2025 | Facebook
SOLD OUT
-------------------------------------------------------------------------
Board In Brum West Midlands Gaming Centre, Walsall, Willenhall, UK
Sat Dec 13
______
Duke's Gaming
& Yecat's Miniatures present
WELSH GT 2026
March 7th & 8th
--------------------------------
APRIL 10th -12th 2026
GLASGOW