After our first game went fairly well due to the ease and straightforward nature of the land game and the mechanic interactions, Chris and I decided to up the action and include more cannons, structures and the Brigantine Chris has done a good job of painting.
We played on a 6 x4 board, using Chris Sea FAT mat and a 3x3 for land, to represent the Buccaneer village of "Frenchwood" (after the social club where the Ribble Warriors meet). My Guarda costa force were looking to exact revenge on the English following their defeat last outing.
The despicable English force consisted of the following:
Experienced Captain, 2 x 8 Freebooters, 2 x 5 Sea dogs with a pair of light cannon, 4 Forlorn Hope
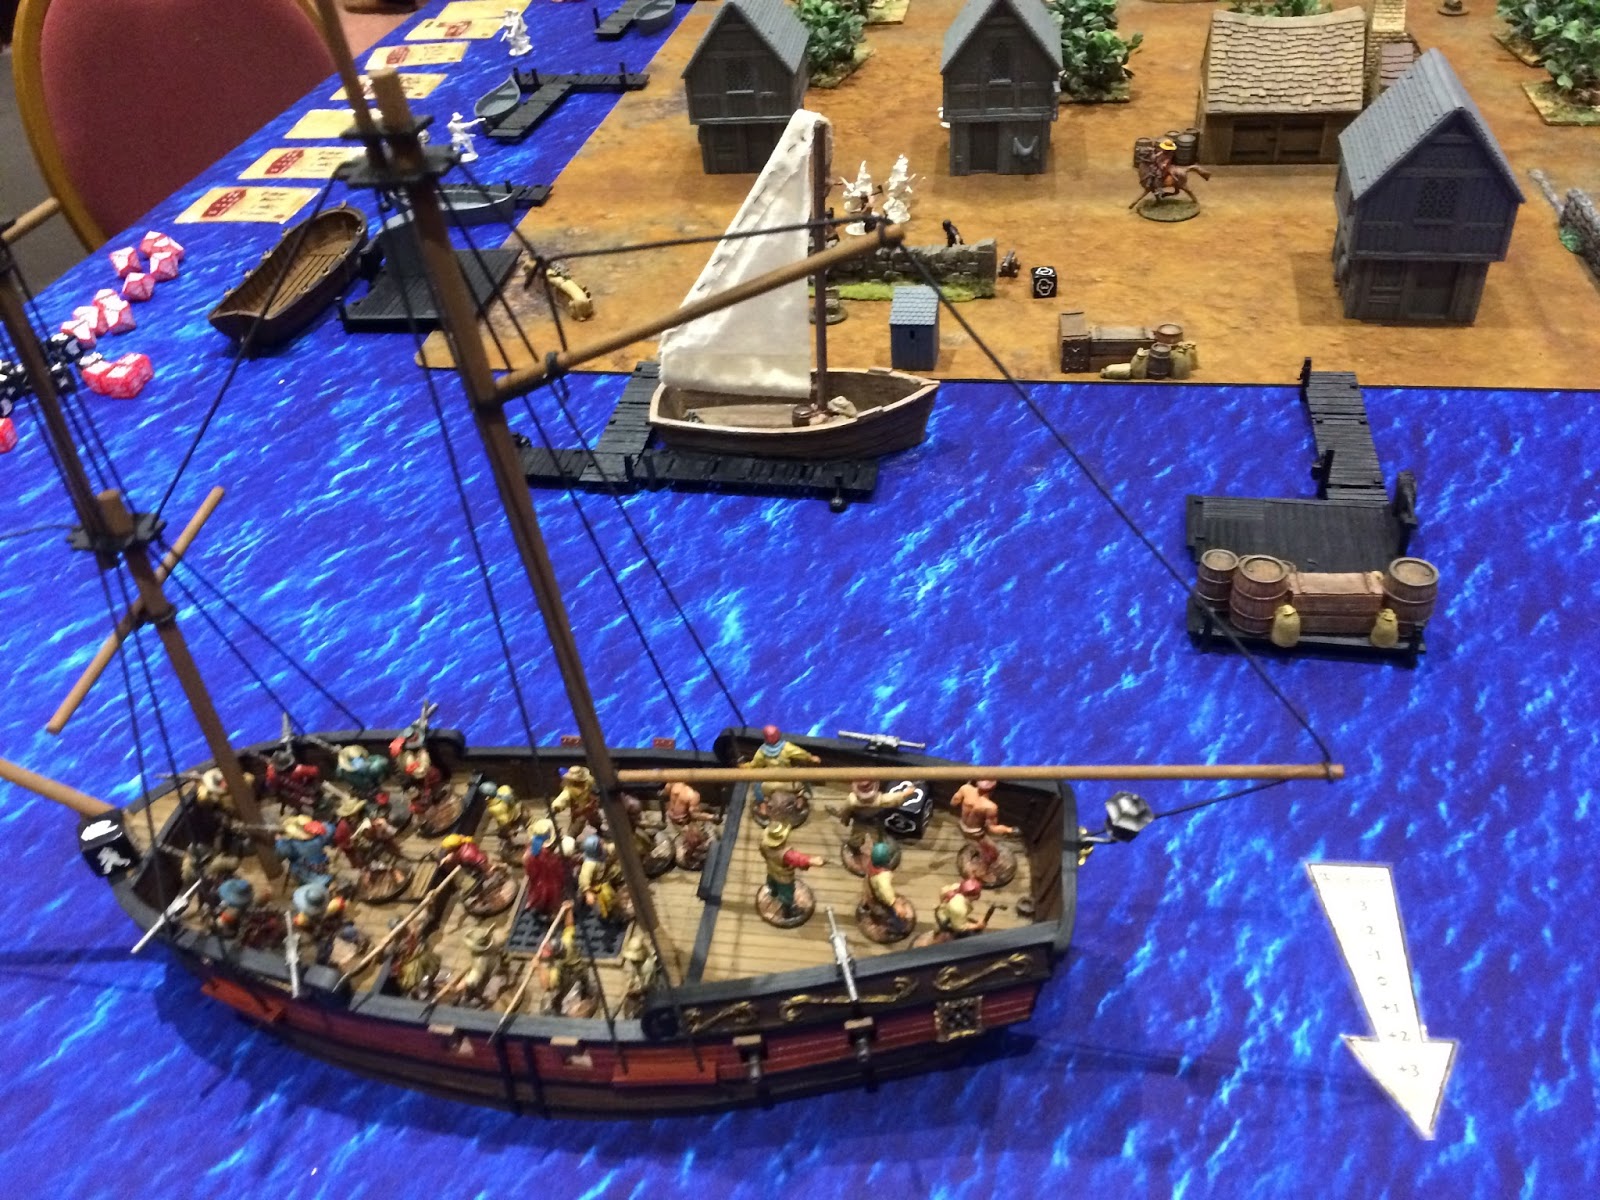
The heroic Guarda Costa consisted of an experienced Captain, 2 x 6 Marineros, 4 Lanceros and 9 Milicianos, all sailing towards glory on a Brigantine with 8 Light cannon. ( I also had to boats in case I needed them)
Spanish deployment below

Plenty of room on board: The Milicianos occupied the fore deck, the lanceros and Marineros with captain amidships, with the second unit of marineros aft

Frenchwood village: GW Laketown provided the 3 grey houses and all the jetties.

The Seadogs set up looking to use their light cannons to defend the village. (ignore the rider, he was just there to look good)

The two units of Freebooters set up behind the buildings, and the forlorn hope did likewise, the English Captain joining the left side Freebooters

"READY TO GO ASHORE, CAP'N!!!"

TURN 1
With the wind in our sails, the Spanish at full speed headed towards the village, straight into the cannon fire of the seadogs unit on the left. Chris was less thrilled than I to discover how cannons worked v structures/ships at 20"-24", he only needed 5+ to hit. Then adding in the Brigantine fortitude, 9+. Such a simple and well balanced method, as the light cannons bounced off the hull at long range. Obviously, the closer you are with cannons (and ships with cannons firing at other ships) the more effective they are.

The Freebooters and Captain advanced to assist with the reloading of the guns in the distance, only the Seadogs had hit the deck after firing expecting return fire. They therefore couldn't reload

The Spanish Marinero's in the centre prepped the guns and took aim at the Freebooters...

As a dedicated action, the bonus allowed both cannons to hit home, with two additional dice also hitting, killing 4 of the English defenders.

However, Chris's stiff upper lip kicked in and he passed all 5 resolve tests. The Spanish ship closed in on the shore line and reduced sail movement from 4" to 3"... Just to note, a ship moves three times during a turn (As I had 4 activating units, the ship would move on 1st activation again, on either my 2nd or 3rd, and again on my last)
TURN 2

The Marineros on the aft deck bide their time and hold fire (as the Lanceros activated instead) as the Freebooters have advanced behind the shacks and the seadogs have gone prone...

The Sea dogs get back up and labour to reload...

The Forlorn Hope advance to support the other sea dog unit, with the Spanish passing on an activation (as they have fewer units, they are allowed to skip an activation) so the sea dogs second unit fire one of their cannons, again failing to damage the Spaniards lovely ship...

The aft deck Marineros target the sea dogs trying to reload, taking 3 casualties, and 3 fatigue, becoming shaken and going prone, again...

Turn 3 & 4
It's an ill wind... Pulling two jokers caused two "Event rolls" The the wind to change, frustrating my landings as I couldn't sail into the wind and also the sun came out, making any move more than 4" take a fatigue point...
Having had fate stymie my plan, I was glad I had the two boats, and had already slowed to 3" move...
I spent the whole of the turn panicking and trying to slow the ship, with my so called sailors taking a dedicated action and blowing fortune points... Needing 3's, I twice rolled 1's.

Chris found this highly amusing, pointing out the scenario rules that I need to have a unit within 4" of the treasure marker or take a strike point. I called "No Quarter" and tried to stop the bloody ship! These two turns allowed the English to take their time and prepare for my landings, with the Sea Dogs damaging the riggings, which also have fortitude and aren't easy to hit. Chris said he was trying to help me stop, but I just figured his gun crew were bored waiting and laughing at my dice... I eventually dropped anchor, and my Lanceros managed to pull up a boat, my last activation in turn 4...

I figured the Captain and his sea dogs should also go ashore...

Plenty of room...
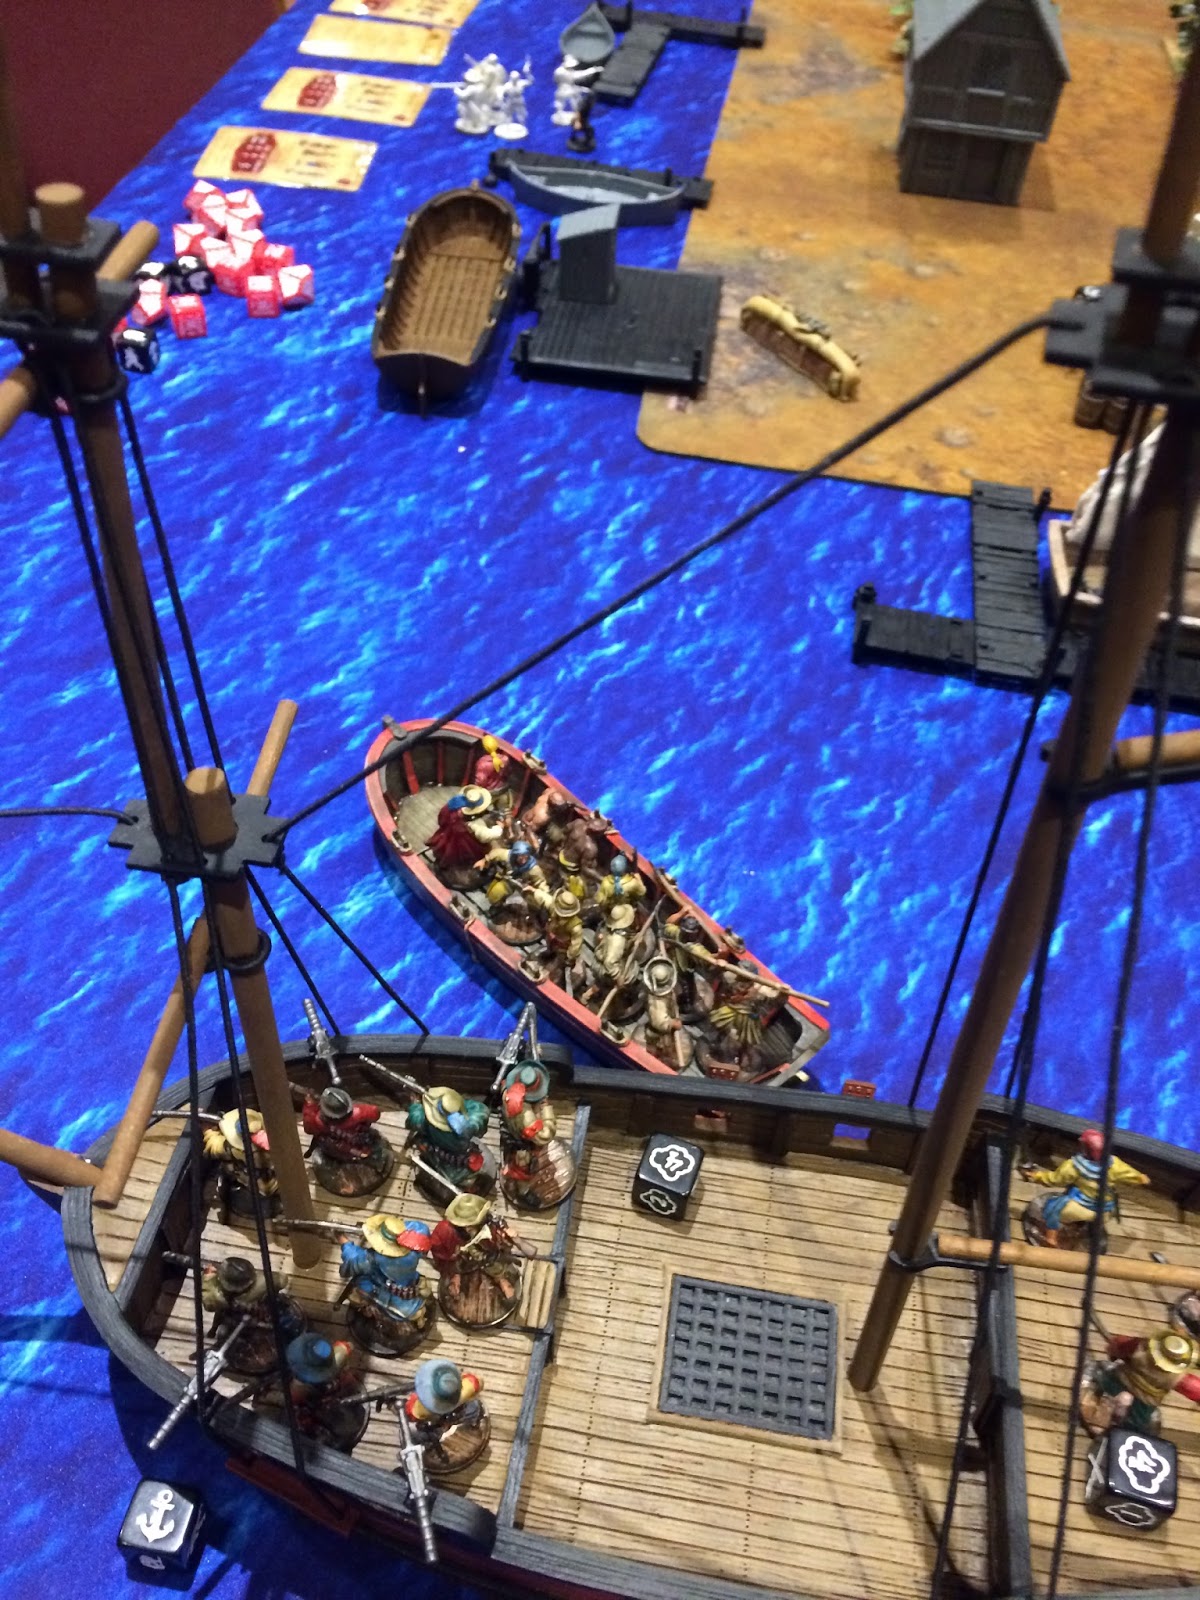
But I was going to hit the beaches in the face of this little lot...

The Milicianos were next up, while the aft Marineros moved amidships to man the cannons there

TURN 5
The Lanceros hit the beach first, looking to get stuck into the nearest sea dogs

Unsurprisingly, the 4 Forlorn Hope got to come and play with 3 Buccaneer guns and a grenade, killing 75% of th Lanceros and the two fatigue they took caused the lone man to rout

The Captain and his Marinero's loosed their pistol shots at the Forlorn Hope. Another fortune point gone not a single hit...

A nice view of Chris's rigging... Far better than watching the iminent bloodbath on the beach!


The Milicianos try a different route ashore, ducking in the low profile boat as the Seadogs fire cannon overhead...

The freebooters ran up and fired, taking a fatigue point but also dropping two Marineros...
Also seems the English casualties from earlier had been disposed off at sea..
As they were close too, my Marineros on ship dropped 4 Freebooters with cannon fire. But the English resolve was pretty impressive, shrugging all potential fatigue off...

Turn 6
With my card winning first activation, who should I go for?

The 4 freebooters seemed least worse, but their side arms defensive fire reduced me to tears (or a man and a captain)

Again, the Freebooters weren't fussed and my beach assault was pretty dismal...Forlorn Hope charged in and put paid to my Captain and his buddy!!!

The Milicianos had doddled onto the jetty, the small sailboat screening the carnage inflicted on their comrades...

Turn 7
They advanced and missed all their shots against the Forlorn hope...

The Freebooters dropped two, the Forlorn Hope 4 (with a grenade). A grenade works verynicely. 1 in 4 Forlorn Hope gets them. The Grenade armed models roll a D10.On a roll of 1 or 2 it blows up and hits the Forlorn Hope. A grenade rolls 3 D10 dice, needing 7+ to hit with no save.

With 4 fatigue, the Milicianos two remaining men were auto broken as they had twice as many fatigue points a men...

Aftermath: Well, the first few turns worked well as we figured out that cannon balls bounce off structures at long range and bounce through infantry in the open... The Jokers were great, triggering events that they changed the game in some respects in that I had to rethink my plans. Events are NOT common, and generally aren't that bad. e.g unruly means the lads ignore the captain (Captain lose a command point for that turn). So don't be put off by it. My inability to roll above 3 when I had to reduce sail was just bad dice, as was the damp sea air knackering my powder as I couldn't hit a barn door with small arms...
All in, it was a good game, we learned how ships moved, how structures/ships take damage and also the effectiveness of cannon fire at close range...
All the mechanics make Blood and Plunder a great well balanced game two games in... Next up, ship to ship!!!
Arrrrr
ReplyDelete