Last time we came up to North East for Bolt Action I ran all inexperienced Kasserine Pass GI's and came dead last, with a wooden spoon too. So decided for this to up it to an all Regular GI's list.
The escalation method meant a 500pts list for game 1, then a 750 fully incorporating the original 500pts, followed by 1000pt game with the 750 list in it.
My 500pts consisted of a Second Lieutenant with rifle, 3 x 8 GI's with an NCO SMG and 2 BAR's, 1 x 8 GI's with an NCO SMG and 1 BAR, a medic and a bazooka team as figured there may be an armoured car or Stuart in a list or two... (There was but I didn't face them)
GAME 1 500pts v Sean McElvoy's Imperial Japanese Army
Sean brought a numerically superior if inferior force of Japanese. It consisted of a mounted Lieutenant, 10 regular Cavalry, 15 bamboo spear fighters, 15 inexperienced troops with rifles, 13 inexperienced engineers with a flamethrower, 2 suicide AT teams (one veteran and one inexperienced) and a political officer. A tough first game, but not a bad match up given his inexperienced troops.
The mission was to gain 3 objectives, one dead centre (on the hospital Nissan hut) and one 12" central from either players side. All units deployed on the board.

Sean set up with his officer and cavalry on my right, the riflemen between them and the bamboo spears in centre, with his engineers on my left with veteran AT suicide team. His political officer and inexperienced AT guy were also central, the latter on his edge objective.

The river we played as impassable.

I set up one squad on my left to face off the engineers, keeping bazooka on my edge objective. I faced the rest off against the hordes, but medic and officer out of harms way.

Turn 1 & 2 was positioning and manouvering from Sean, while I was shooting at long range. He decided not to risk the cavalry and recce'd away but two BARs were in range and they took a pin. I also used an ambush order in turn 2 to take out his officer with a pair of BAR's, and his cavalry failed in turn 2 to act. Also, on my left, my GI's closed into the woods to point blank the Engineers and managed to reduce them down a bit. But the main event of the first two turns were the Bamboo fighters and riflemen BOTH rolling 5's on their Green tests after a wound or two, so I was facing a much different picture being outnumbered by similar regular troops (though the Bamboo fighter were on 3 or 4 pins)

Turn 3

Well the cavalry stayed down for a second time, but the regulars were moving in. And the eight Engineers came stomping in for a simultaneous fight with my 8 GI's, losing 5....

Sadly, I lost 6...

And not an exceptional so leaving the flamethrower in it...

Still, centrally it was a good match up.

The GI's on the objective my end finished off the Japanese Engineers, but the other 2 squads fire was ineffective on their newly promoted opposition...

Turn 4. Cavalry advance on my flank, and I have some work to do.

Well, can't win by leaving the centre objective to the enemy, so two squads advanced up ready for turn 5 assaults (if I could get the draw of the dice)

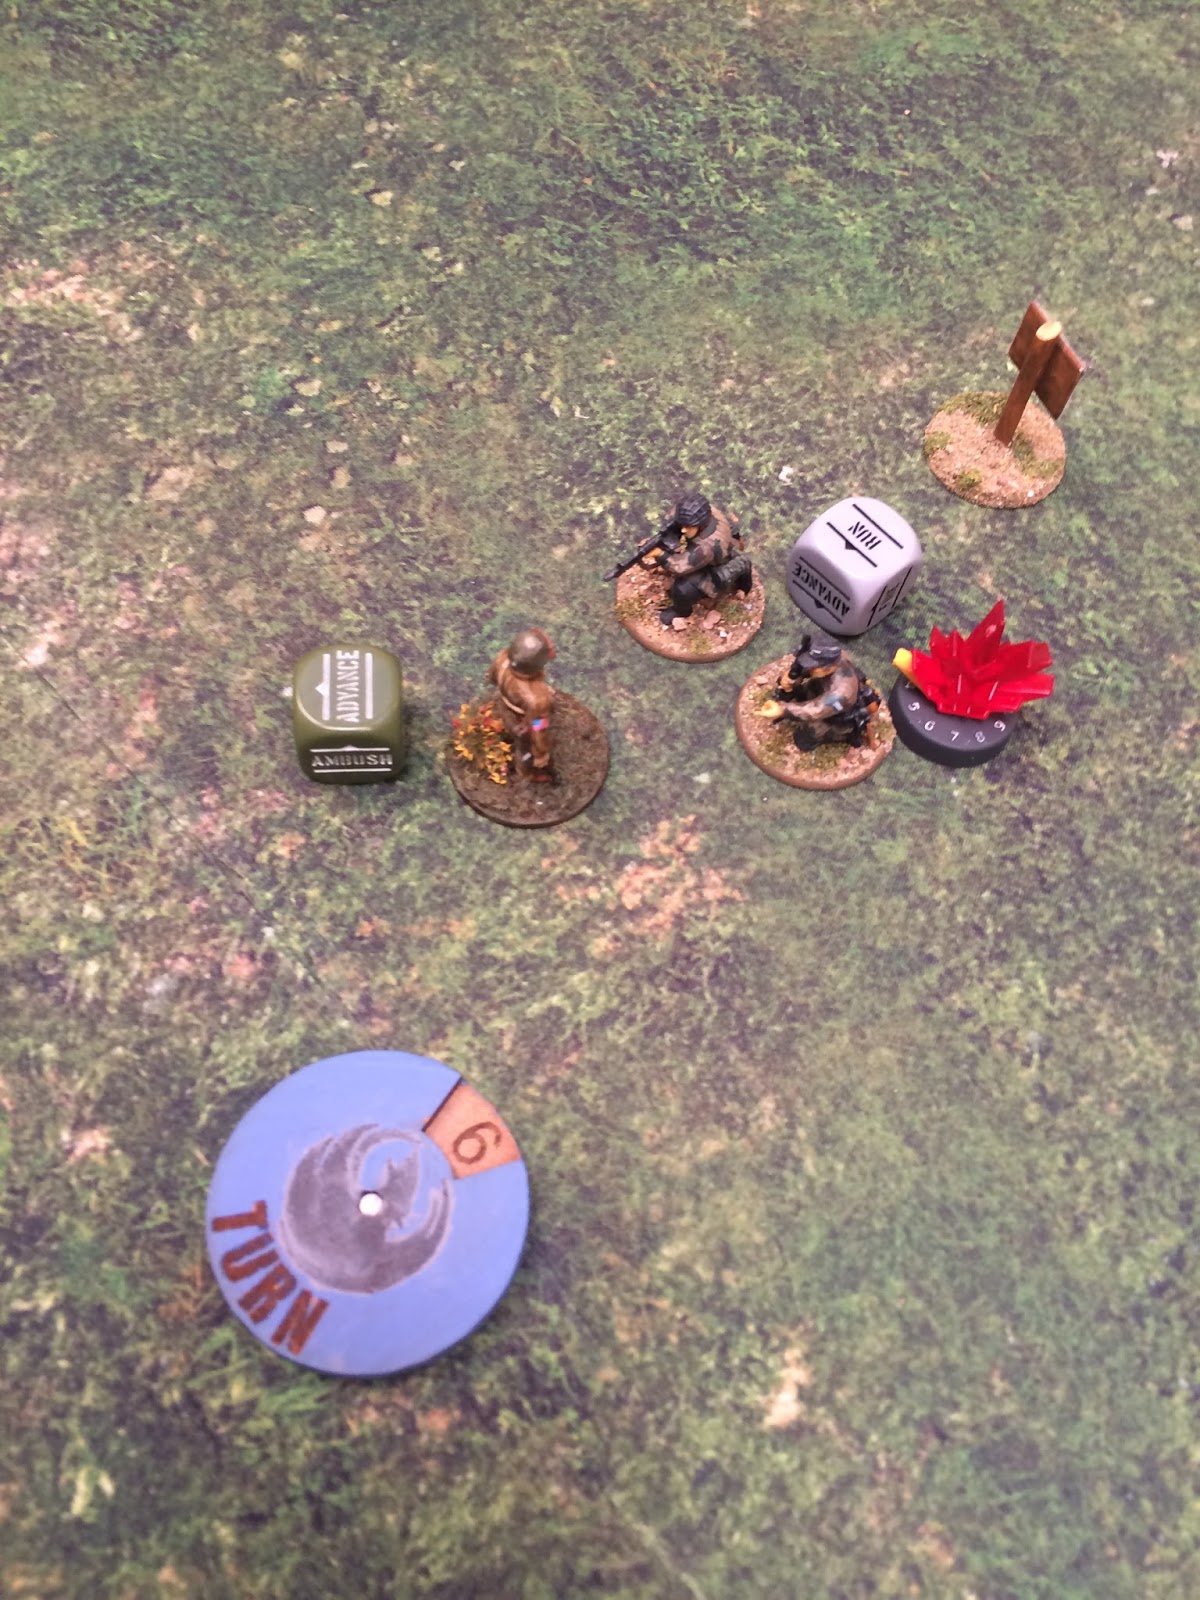
Well, the dice was mine and in went my left squad by the river. 8 GIs get the drop on 11 bamboo fighters. And get slapped after drawing first round...

Sean's Regular troops assaulted my squad and wiped them out in short order.

With only 5 GI's left I advanced them up for turn 6, as the bazooka team killed the veteran AT suicide man

Think the cavalry were rallying (or biding their time) this turn...

Got the drop in turn 6, with my 5 Regulars charging in against the 5 remaining Imperial riflemen. And I didn't do well. The return attacks wiped me out. (John Randall, I feel you pain...)

The Officer did manage to shoot a horseman before he took another one down but was trodden underfoot...

The riflemen advanced and took out the bazooka, finishing the game with just my medic looking to surrender.

Have to say, dice were bad, two inexperienced units going up to regular was terrible but the game was great. For 500pts, it was pretty tense and nicely balanced for a good while. Really good way to lose, and could have been so different but no doubt about it, Sean played well as cavalry didn't even really play a part having spent half the game grazing...
GAME 2 750pts v Tony English's Fallschirmjager
Tony had a nice FJ force, and had been warned about my "lucky" dice as he'd faced off against Chris's US Marines first round.
His 750pts consisted of 1st Lt +1 with assault rifles, medic, 5 FJ's with LMG, 2 x 8 FJ's with 4 assault rifles and an LMG, 5 Pioneers with 2 SMGs and flamethrower, Horch heavy field car, sniper team and medium mortar.
I had upped my force as follows: Second Lieutenant with rifle, 3 x 8 GI's with an NCO SMG and 2 BAR's, 2 x 8 GI's with an NCO SMG and 1 BAR, a medic, bazooka team, Sniper team, medium howitzer with spotter and Chaplain Trump...
The mission was simple. Both officers set up 12" in in centre, and all other forces deployed on board. If you successfully assaulted the enemy officer and win, you win. If you kill him any other way, you lose. If neither officer is killed in an assault, the games a draw. Technically, both sides could win...

Set up: 5 FJ's with LMG on my left, medium mortar behind woods with medic and 8 man squad, officer central.

German sniper in hut, Pioneers in heavy field car and 8 man squad behind the hut. Mortar spotter in woods.

I deployed my Howitzer on left, one squad in left woods, with Chaplain and medic behind, 2 squads in open near officer, sniper in hut, 2 squads and bazooka on my right.

TURN 1
1st dice was German, and his sniper took out mine. Second saw LMG FJ's advance and put a pin on howitzer after killing a crewman. I then ran up a squad into hut to apply pressure and draw fire.

My squad in the left wood failed to hit the LMG 5 man squad, and my officer retreated behind the house while a squad occupied it. The Pioneers in the field car advanced on the German back line to threaten my right, so I abandoned subtlety (which I'm not famed for anyway) and rest of my squads straight up behind centre right house with supporting bazooka. Trump went off to help the howitzer while medic stayed central.

My right at end of turn 1.

TURN 2
The 5 men with LMG took out my medium howitzer... leaving the Chaplain feeling all alone for now. (Anyone would think people didn't like him)

Deciding to tip my hand to Tony (i.e. I tend to play aggressively and trust to luck), I advanced out the centre left house into point blank range of his 8 men in the woods. With pin and soft cover, required 3's. Not great, but happily killed 2 FJ's

My bazooka went on ambush to give the Pioneer truck something to think about, which it did and turned around again behind the woods. I lost the bold left squad in the open unsurprisingly but still took out another FJ nearby from 2 BARs in the house, leaving that squad with 5 men. Medic ran up centrally as sniper wasn't looking for him, and unit advanced out left wood. With only his medic and mortar left, I again ran my two right squads, this time right down the centre on the snipers hut, where the FJ Leutnant was sitting behind.

TURN 3
Love waving the flag, but they had a pin...

So the squad behind charged in and dealt with the sniper team, applying maximum pressure to the Germans... Also got second dice, so flag squad moved up and took out half the left assault rifle squad out, down to three men and Tony promptly rolled ten with a pin. I was well chuffed until Tony pointed out they are Stubborn.

The LMG squad got a measure of vengeance taking out 3 GI's...

Biding his time, the second assault squad advanced up to add more pins on my GI's but were poor marksmen and didn't achieve much. With the pressure on, the FJ Pioneer truck dodged the bazooka and unloaded to incinerate the GI's in the hut... Note the cowering Boche hiding under the floorboard.!!

Better view of the deathtrap. Only actually caused 1 wound, but failed the morale test. And he overdid it with the fuel, as the flammenwerfer ran out of juice.

With the FJ's forced out of their cover, my remaining two squads advanced up and let rip...

TURN 4 and medic really shouldn't be leading the way.

My advancing GI's really shouldn't be using FJ dice against FJ's...

The Pioneers and reduced squads took my left squad down to 2 men, including 2 exceptional damage so I could use my medic. Still, Chaplain Trump had caught up. And the Pioneers were down to two men and assault rifles had failed to activate and had 3 pins, with even bazooka joining in...

I was now outmanned, out diced but still had the advantage as I was pressing the Germans...

So I pushed my luck to the max, charging home against the heavily pinned FJ's (3 pins and over half range). And the dice were good!!!

In the aftermath, things went mental. My bazooka team charged in against the 2 Pioneers with SMG's, losing in the 4th round of melee and the lone NCO consolidated to block off any assault from me on the Lt. The Germans took the recently victorious GI squad to half strength and on 3 pins. And the medic also took his life in his own hands to interpose himself before the Lt.

TURN 6
My squad of supermen failed were shot up, forcing morale which they failed. The LMG squad on my left shot up my left squad that hadn't moved yet so I risked my officer who had advanced up to try and help... and those 3 assault rifle GJ's then passed their 3 pin test to go in and finish off the GI's, consolidating right up to my Lt...

End of turn 6...
Overview near end of turn 6, with German officer and Pioneer NCO near the truck, while I'm left with just the medic and Chaplain Trump still to activate. (Neither of whom can shoot or assault)

TURN 7
Moral support before 1st dice drawn... which was mine. So, could I outrun the Germans. Yeah, technically I could have but where's the fun in that, we're at war after all. So armed with his rifle, in went my Regular 2nd Lt against 2 battle hardened FJ's. I killed one, and the other surrendered (or failed to hit if you're being pedantic).

I consolidated out of range of the LMG squad, as I wouldn't wanna push my luck any further.

The last action of the game was just petty spite, Tony taking time to form a nice little firing squad and took out my chaplain... Dastardly deed indeed!!!!

That was simply awesome, and a draw was a fair result. Apparently a lot of games were this round, and many sounded very cagey with players not wanting to over commit. Well, Tony and mine wasn't cagey and Tony didn't have chance to commit anything forward (Pretty sure Pioneers were gonna swoop round) as it was a proper in your face, bloodbath of a game, with Tony on the back foot but the innate FJ stubbornness shone through and they could have won it at the end. There were real ebb's and flows with the dice but the action was non stop and so tense...
GAME 3 v 1000pts v Mick Wadd's DAK
Mick had an all regular DAK force, beautifully painted and brimming with character. However, as he had fewer dice it meant he had to attack in this scenario. The mission was again simple. His 750 started 1st wave, next 250 in reserve. I had my 500pts on table and subject to a preliminary bombardment, my first 250 first wave and final 250 in reserve. No outflanking. Defender would score 2 points per enemy unit killed, and 1 point per their unit in my half, 2 per units in my deployment at game end. (Originally we were due to play on a Stalingrad type board, all hard cover and difficult ground which we both agreed would have not been much fun, so we swapped to an other unoccupied layout, with Andrew Dunn's permission)
Mick's 1000pts was as follows: 1st Lt plus 1, 4 x 9 DAK with 1 SMG and 1LMG, 2 x MMG team, 1 AT rifle, 1 PAK 38 or 40, 1 x 8 Kradschtzen and a Panzer Jager I. The last 2 formed the DAK reserve.
My valiant defenders consisted on board of: Second Lieutenant with rifle, 3 x 8 GI's with an NCO SMG and 2 BAR's, 1 x 8 GI's with an NCO SMG and 1 BAR, a medic, bazooka team
1st wave Sniper team, medium howitzer with spotter, 1 x 8 GI's with an NCO SMG and 1 BAR and Chaplain Trump
Reserve: Jeep with Flamethrower team, M7 Priest
The board was fairly open, with good roads, soft cover, a few woods and a central hard cover ruin.
I deployed 2 units on my left with officer and medic, 2 units on right with bazooka.

I lost a man to the prelim in my right most squad, as well as the medic on my left. Only one unit escaped without pins.

Turn 1. First waves came on, and that was about it...
The DAK deployed heavily on my right, with a pair of MMG's and AT rifle going centrally provide cover.

My 5th squad on first wave came up with chaplain on my right, while M4A2 howitzer came up just off road to cover both Axis roads and my right. My left most squad advanced up and killed an MMG crewman with a BAR shot and bazooka advanced closer to the road.

TURN 2
Having seen the German dispositions, my guys started to counter. My two left squads advanced up to tackle the MMG support, while my two of my three right squads put pins on the DAK opposite, including taking 4 men down out of one exposed German squad, the third advancing up behind woods. A lucky howitzer round took out the remaining 5 men from the DAK centre squad, leaving all the troops on my right. My bazooka went on ambush.
.

The German return fire was largely ineffectual, save my ambushing sniper who shot at a DAK LMG, and attracted its attention but failing to kill. Mick rolled the magic four sixes, as range, pin, small team, moving meant 7's to hit, then wound then exceptional damage. My officer switched flanks following the Chaplain centre right.

Mick held off the Panzerjager (or it failed to come on) but the Kradshutzen drove up the road and dismounted ready to assault my bazooka team...

TURN 3
I got the first dice and killed 4 Kardschutzen, who failed their morale and fled. I felt pretty confident about now on my ability to hold the right being largely untouched and having taken out two whole squads. But Mick had other ideas and advanced other squads up using snap too, and along with the PAK reduced two of my squads to 4 men each. I took out an MMG with my centre left squad in the ruins.

The Panzerjager showed up on my left but didn't hit anything...

I had plans for that Panzerjager still in reserve (but down), and also a bazooka, and a howitzer on covering the road. So I put the Priest advancing on my right, where it had a plethora of targets. Of course, having bought it from Chris Carr its opening shot...

TURN 4
On the left, the Panzerjager advanced down the road, missing the Priest. Bazooka had first pop, and missed, so my jeep came on, flamethrower advanced to flank, and missed...

The howitzer had a good shot. Actually, it had a good view, and a bad shot...

In the centre, my squad in the ruins killed the AT rifle after advancing forward, rather than to the left... (I had confidence in the Priest and my men after all). On the right, men advanced, shots were fired, including a pin on the open-topped mobile howitzer, troops failed orders but it seemed quiet, like the calm before a storm...

TURN 5
The Germans got the first dice, and the Panzerjager took aim at the Priest. Fortunately it went wide. I then looked to the Priest again to flatten a unit... Another one rolled. (Damn you, Carr!!!)

Snapping too, the German officer got some of his men to assault the bazooka, losing two men to the simultaneous attack before overcoming the US AT team, while another squad of DAK hosed down the four men near my chaplain...

My officer and chaplain were looking a trifle exposed now, with only on unit left on my right.

Things went from bad to worse, as the PAK now had a clear line of site and was just under half range and drilled a hole right through the Priest....

And to add insult to injury, the flamethrower team still couldn't hit!!!!

The DAK squad on my extreme right moved up into the woods and fired ineffectually on my remaining right GI's. It was looking a bit dodgy over there now...

Still, the flank shot on the Panzer jager improved morale... until I rolled poorly on the penetration roll, so that the German tank killer only took a pin!

My officer sheltered in the wreckage, and shouted encouragement to the remaining squad on my right, who assaulted the activated DAK squad in the open and cut them down...

Cant believe this was still trundling along!!!! My left squad reduced the MMG team to one man, and the ruin squad advanced out and killed a crewman of the PAK after what they did to my Priest....

END OF TURN 5 OVERVIEW

First dice was mine, and my GI's went in against the DAK squad that had killed the bazooka team, winning comfortably.

The DAK squad in the woods came out and wiped out my officer. The German officer team ran up nearby.

The Panzerjager accelerated over to threaten the Chaplain, and get behind the wood away from the howitzer, while the last German MMG was threatened by the flamethrower. The PAK turned to face my advancing flag squad..

We got a turn 7, and I assaulted the DAK squad but third time wasn't so lucky as the were unpinned and yet to activate and cut my GI's down in short order.

Chaplain Trump crossed the hedge to safety and realised if he had built a wall, the Germans might not have been able to get into my deployment so easily...

The last activation's saw the German MMG get taken out, and the gun shield saving the PAK...

Remember in turn 3 how confident I said I felt on my right... proved to be a bigly error of judgement!!!

Another awesome game, very tense again and incredibly close. Working out the points, saw Mick's DAK have 3 units in my deployment and kill 8 units, for 14pts. I had killed 6 units, for 12 point and two point margin was required for the win... Another thoroughly enjoyable loss, and a masterclass in schwerepunkt from the Mick and his Germans.
Overall, one draw and two defeats against 3 great opponents and 3 different armies. The scenarios were great, and key to making the games as tense and such fun as they were. A big WELL DONE to Dom Sore, Ben Rolls and Andrew Dunn for that. Also should mention, every player got a prize, thanks to some good quality and generous prize support from several companies...
I came 21st out of 22nd, so no wooden spoon, but I was actually buoyant on the long journey back, as definitely out of the Bolt Action malaise I'd been in beforehand of late... Still concerns with the general event scene, the proliferation of Stuarts at the event evidences that (Japan, US, British and Russians all having them). But credit to the German player with the Panther. Some really nice forces, but alas didn't take the time to snap them, sorry!!!.
No comments:
Post a Comment